Piece Interaction Design
Board is a hybrid digital-physical platform. The Pieces are the controller: the way a player picks them up, slides them, rotates them, and sets them down is the input loop your game responds to. Good Board games treat the physical motion as a first-class part of the design rather than as a translation layer on top of conventional UI.
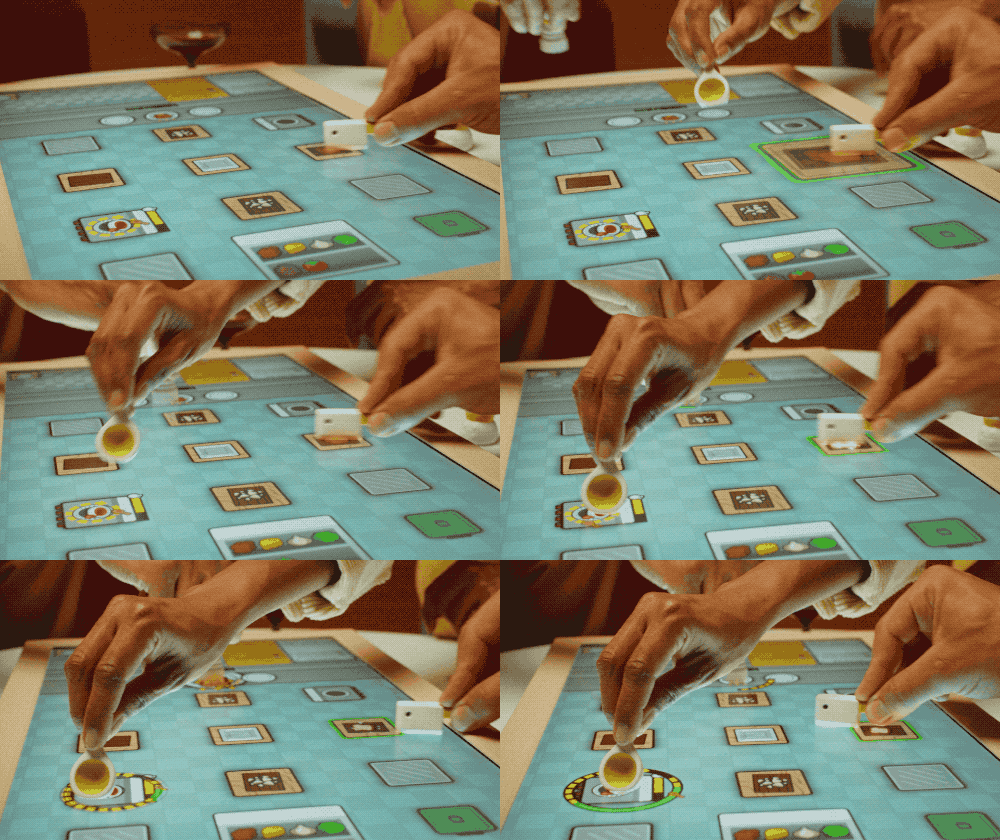
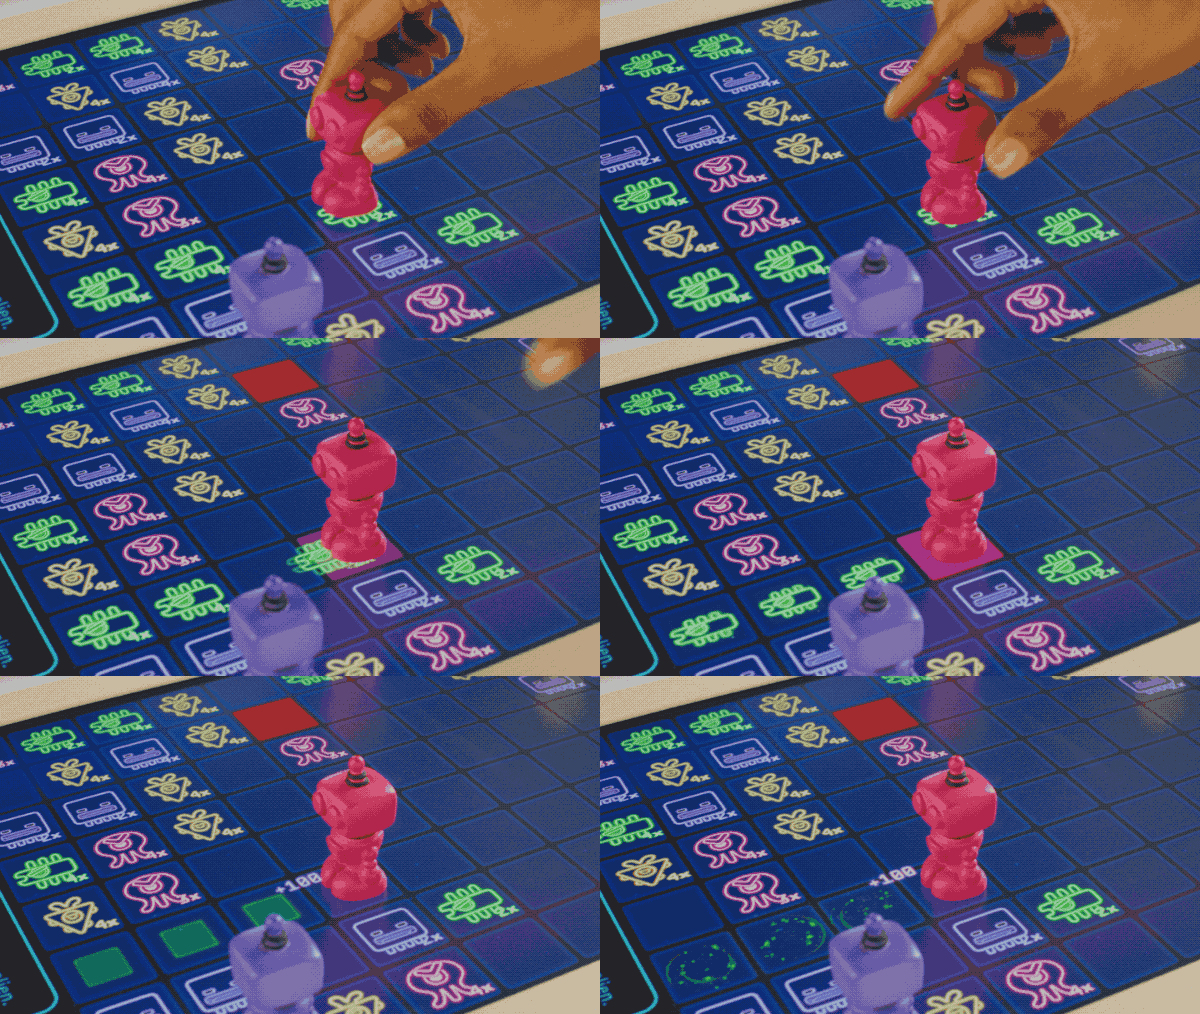
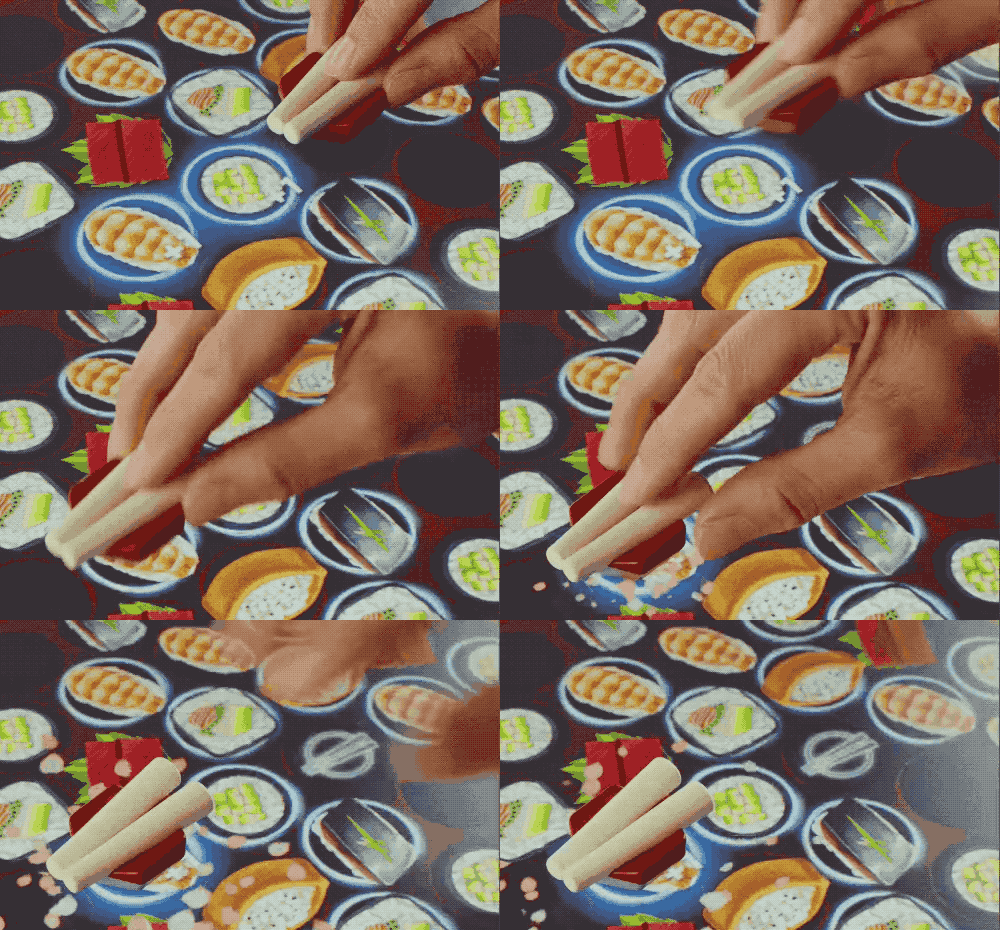
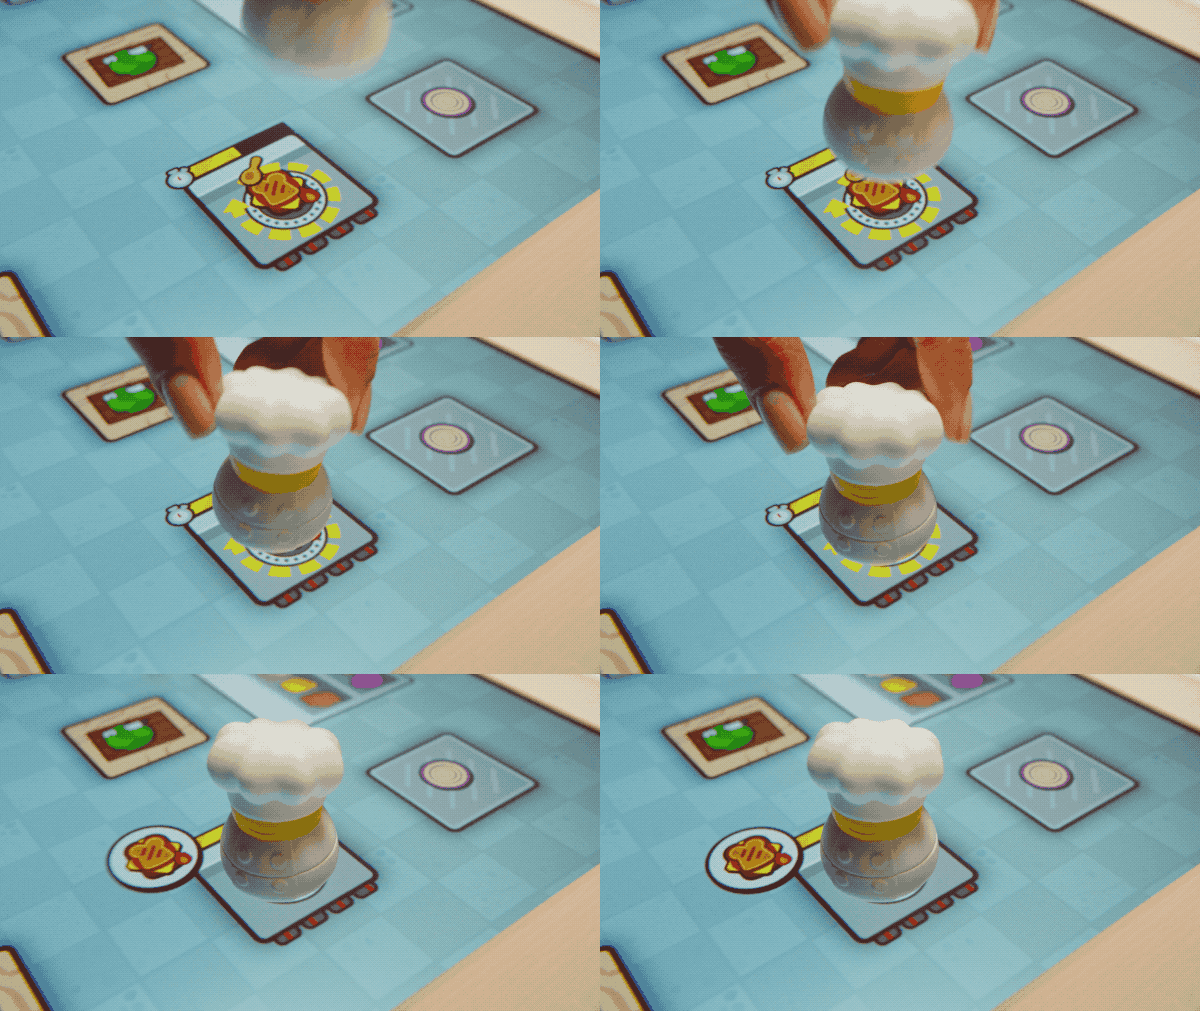
This guide is mostly platform-general design guidance. It does not lean on any specific SDK, but every interaction described here maps to data already available from the input API. See Touch for the full code side: the contact model, phases, coordinate and orientation conventions, and how each SDK delivers contacts (Unity polls, Godot emits a signal, Web subscribes a callback). The snippets in this guide assume you have that loop running.
New to Board’s input model? Read Touch for how recognition works and Pieces for what a Glyph is and how a Piece Set maps to Glyph ids.
Why Pieces matter
A Piece is more than an avatar for a player. It is a physical object the player must touch, move, and reason about in three-space. That carries design consequences:
- Pieces have inertia. Moving a Piece takes longer than tapping a button. Pace your game around the player’s hands, not their reflexes.
- Pieces have presence. A Piece sitting on the board is visible to everyone around the table. State that lives on Pieces is shared state: players read it without needing the screen.
- Pieces are tactile. Players notice the weight, finish, and shape of each Piece. Different Pieces in a set should feel distinct in the hand.
- Pieces are fragile in motion. Tracking can momentarily drop when a Piece is moved very quickly, lifted at an angle, or covered by a hand. Design forgiving interactions.
The best Board games are ones a player would still understand if you took the screen away: the Pieces alone tell you what is happening, and the screen is the amplifier.
In traditional video games, the controller is a foregone conclusion (pressing buttons on a gamepad, tapping keys, clicking a mouse, dragging on a touchscreen) and is neutral by design. The fun is on the screen, not in your hands. On Board the Pieces cannot be a neutral controller. If a player ever thinks “this would be easier with a mouse,” then the game’s mechanics are not native to Board. It has to be fun to play with Pieces.
Interaction types
There are seven core interaction primitives a player can perform with a Piece. Each maps cleanly to data your game reads from the contact stream: a contact’s lifecycle phase, its position, its orientation, and (for Pieces) whether a hand is touching it.
Place and Lift
The most fundamental interaction. A Piece arrives on the display (a contact in the Began phase) and eventually leaves (a contact in the Ended phase). Place-and-lift is the right primitive for:
- Turn-based moves. Drop a Piece on a square to commit a move.
- Spawn and despawn. Place to summon a unit; lift to dismiss it.
- Inventory. The board is the player’s hand; placement is “I am playing this card.”
When you process a contact, branch on its phase to spawn a visual on placement and tear it down on lift. (See Touch for the full snapshot loop that hands you these contacts each frame.)
using Board.Input;

void ProcessContact(BoardContact contact)
{
    switch (contact.phase)
    {
        case BoardContactPhase.Began:
            OnPiecePlaced(contact);   // arrived on the display
            break;
        case BoardContactPhase.Ended:
        case BoardContactPhase.Canceled:
            OnPieceLifted(contact);   // removed from the display
            break;
    }
}
import { BoardContactPhase, type BoardContact } from "@board.fun/web-sdk";

function processContact(c: BoardContact) {
  switch (c.phase) {
    case BoardContactPhase.Began:
      onPiecePlaced(c);   // arrived on the display
      break;
    case BoardContactPhase.Ended:
    case BoardContactPhase.Canceled:
      onPieceLifted(c);   // removed from the display
      break;
  }
}
func process_contact(c: Dictionary) -> void:
    match c.phase_id:
        Board.input.PHASE_BEGAN:
            on_piece_placed(c)    # arrived on the display
        Board.input.PHASE_ENDED, Board.input.PHASE_CANCELED:
            on_piece_lifted(c)    # removed from the display
Design tips:
- Make the placement zone visually clear. A glowing target square reads instantly; a subtle outline does not.
- Give the player time to commit. A 200ms hold-to-confirm window prevents accidental placements when the player is repositioning.
- Confirm placement with both visual and audio feedback. The player’s hand may still be in the way of the screen, and sound carries.
Slide
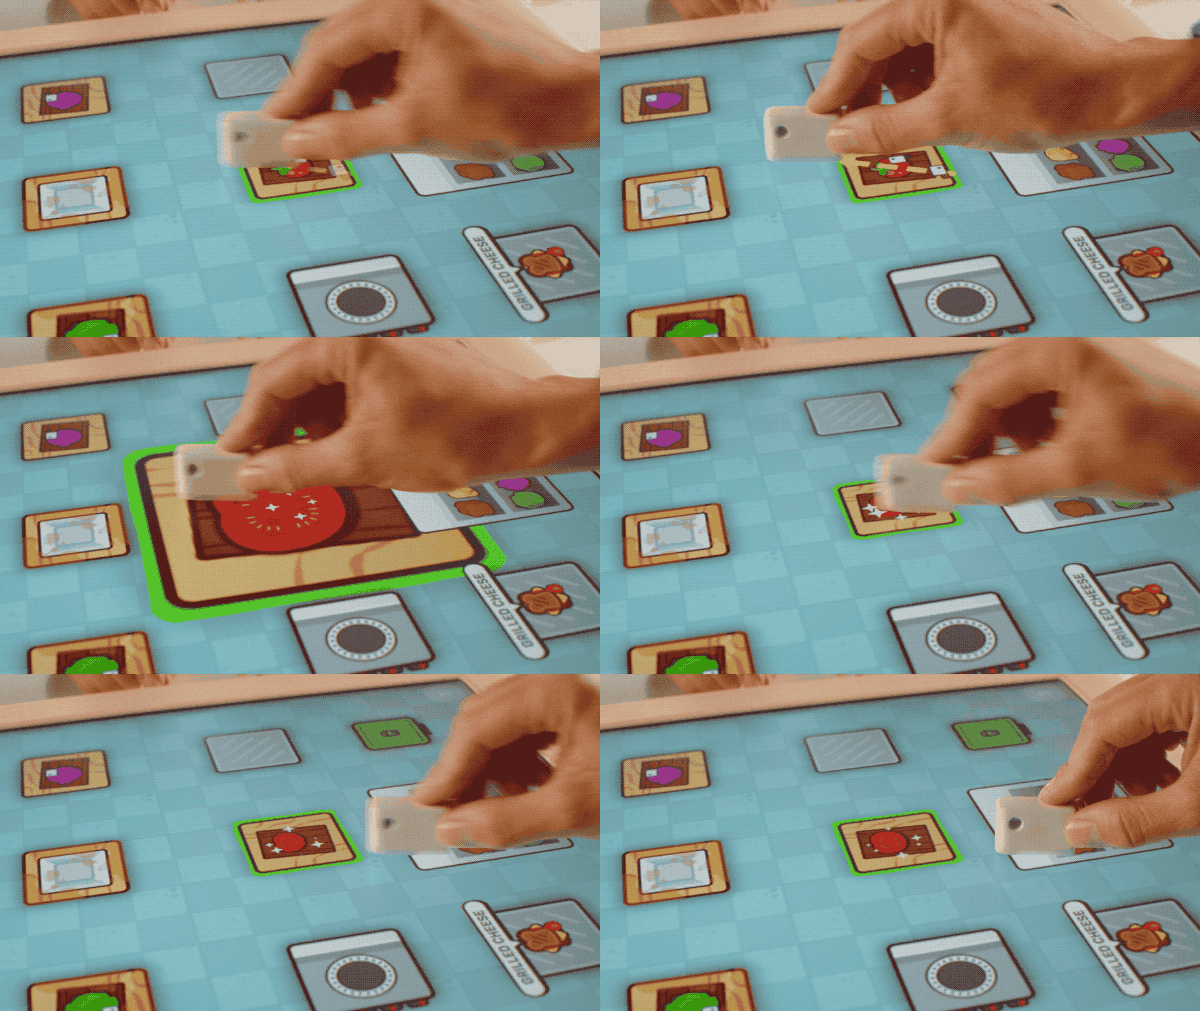
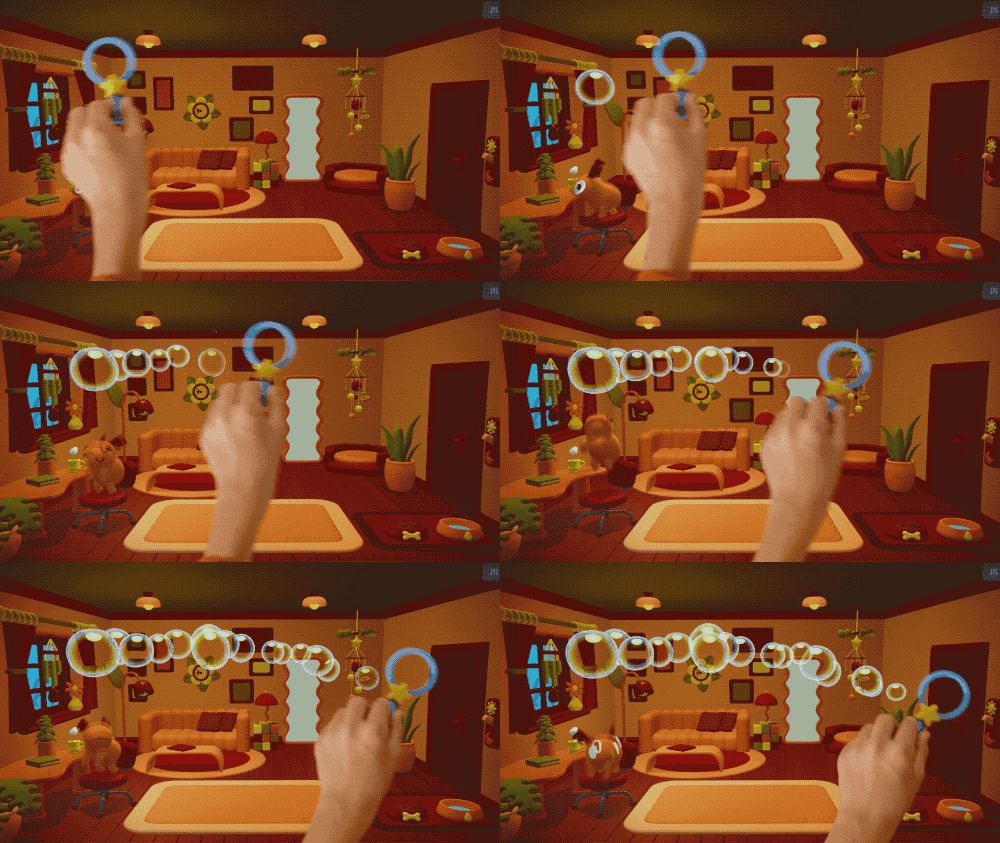
The Piece stays on the display while the player drags it. Sliding generates a stream of contacts in the Moved phase and is the primitive for:
- Continuous positioning. Dragging a unit to a destination.
- Drawing. The Piece’s path is the input.
- Aiming. The Piece’s position relative to a target controls the angle.
Read the contact’s position on every Moved frame to follow the slide. Position is in display pixels in every SDK, but the origin, axis direction, and value type differ per engine (see the conventions table in Touch).
// Vector2 in Unity screen space (origin bottom-left, Y up).
if (contact.phase == BoardContactPhase.Moved)
{
    Vector2 pos = contact.screenPosition;
    DragUnitTo(pos);
}
// Pixels, origin top-left, Y down (matches canvas / DOM coordinates).
if (c.phase === BoardContactPhase.Moved) {
  dragUnitTo(c.x, c.y);
}
# Pixels, origin top-left, Y down (matches Godot's 2D screen space).
if c.phase_id == Board.input.PHASE_MOVED:
    var pos := Vector2(c.x, c.y)
    drag_unit_to(pos)
Design tips:
- Do not fight the player’s hand. If they are sliding slowly, do not snap to a grid mid-motion; wait for them to stop.
- Visualize the slide path. A trail behind the Piece tells the player “the game is reading this.”
- Respect the device’s smoothing. The SDK already applies position smoothing; layering your own on top causes lag.
Trace
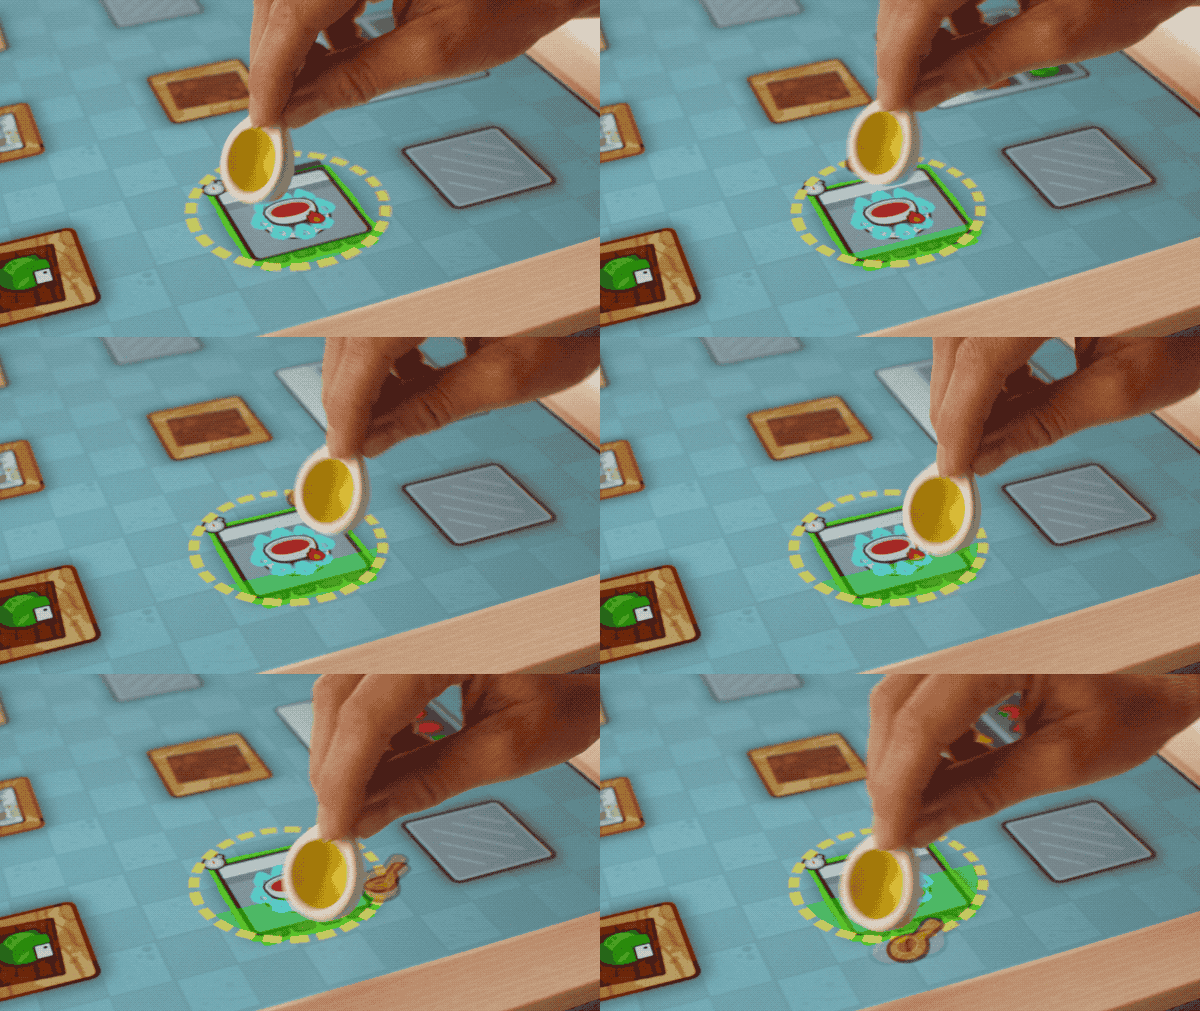
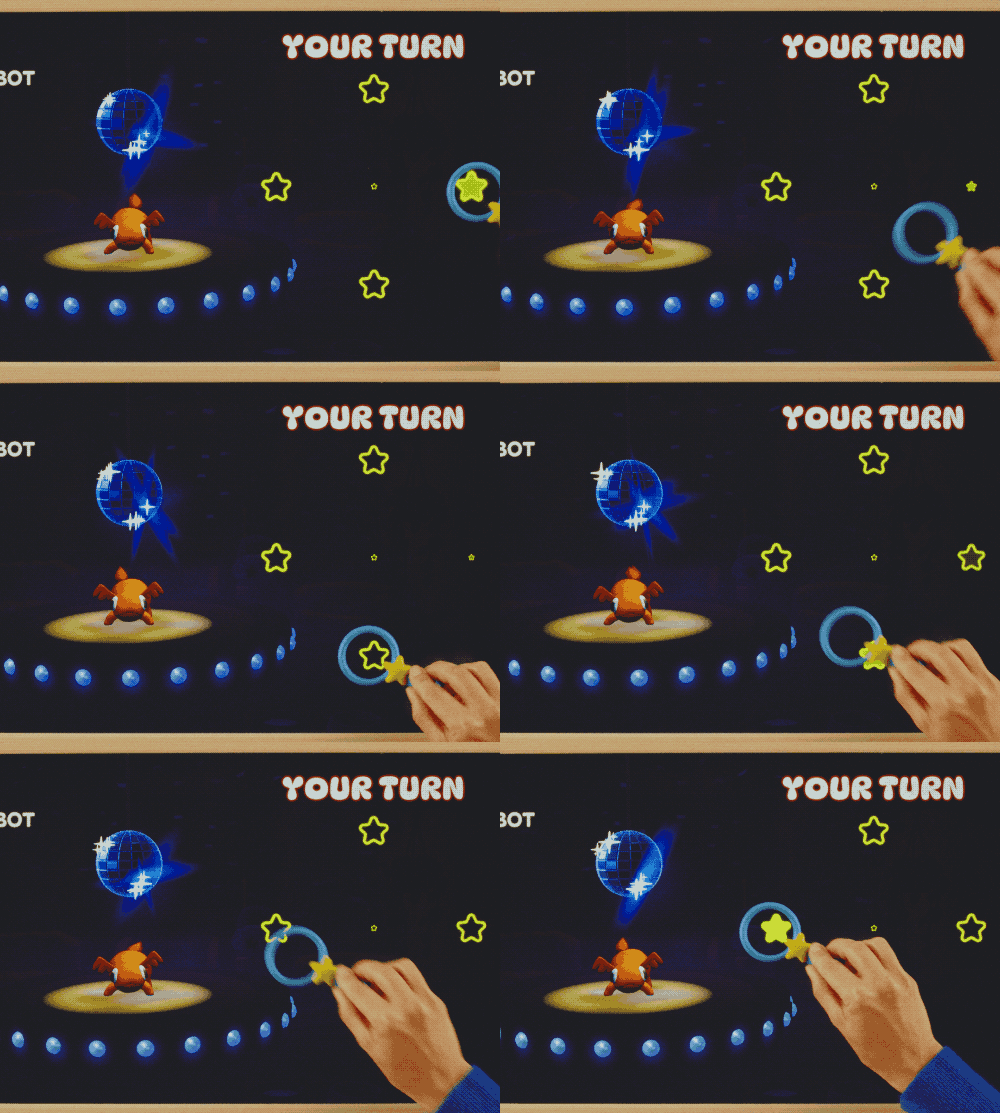
A specialized slide where the shape of the path matters, not just the endpoint. Tracing a letter, a circle, or a constellation transforms Piece motion into gesture recognition. Mechanically it is the same Moved stream as Slide; the difference is that you accumulate the path and match it against a target shape.
Design tips:
- Provide a guide. A faint stencil of the shape the player should trace removes ambiguity.
- Be lenient. Hand-drawn shapes are messy, so a 70% match should count.
- Give scoring feedback as the player traces, not after. A growing fill or a brightness bump per segment keeps them engaged.
Shake
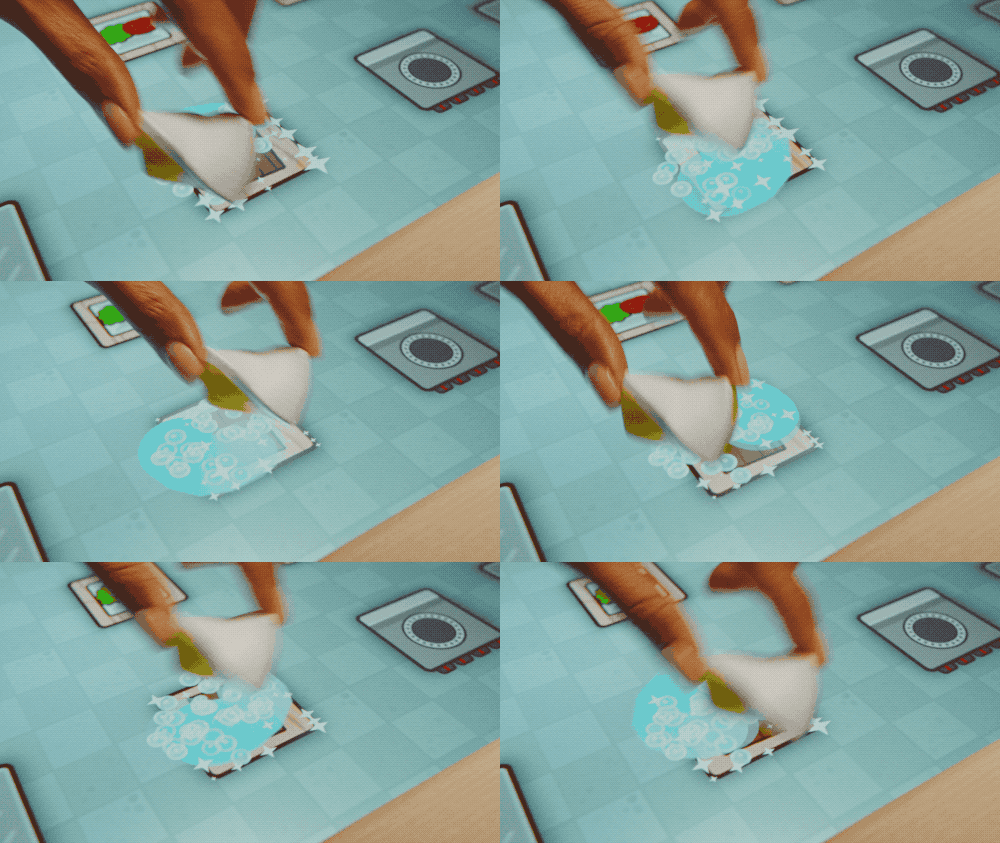
Rapid back-and-forth motion of a Piece. Shake generates frequent Moved contacts with high velocity in alternating directions. Use it for:
- Activation. Shake a Piece to “wake it up.”
- Charging. Shake builds a meter that fires when released.
- Free-form energy gestures that do not fit a grid.
Detect shake from velocity, not absolute position: compare the current position against the previous frame’s position for the same contact id and watch for rapid direction reversals. The conventions for which position field to read are in Touch.
Design tips:
- Detect shake from velocity, not displacement. A small rapid motion is a shake; a slow large motion is a slide.
- Reset the detector when the player lifts the Piece. Resuming a shake from where it left off feels broken.
- Use audio cues. The player’s eyes will be on their hand, so the game’s response needs to be audible.
Rotate
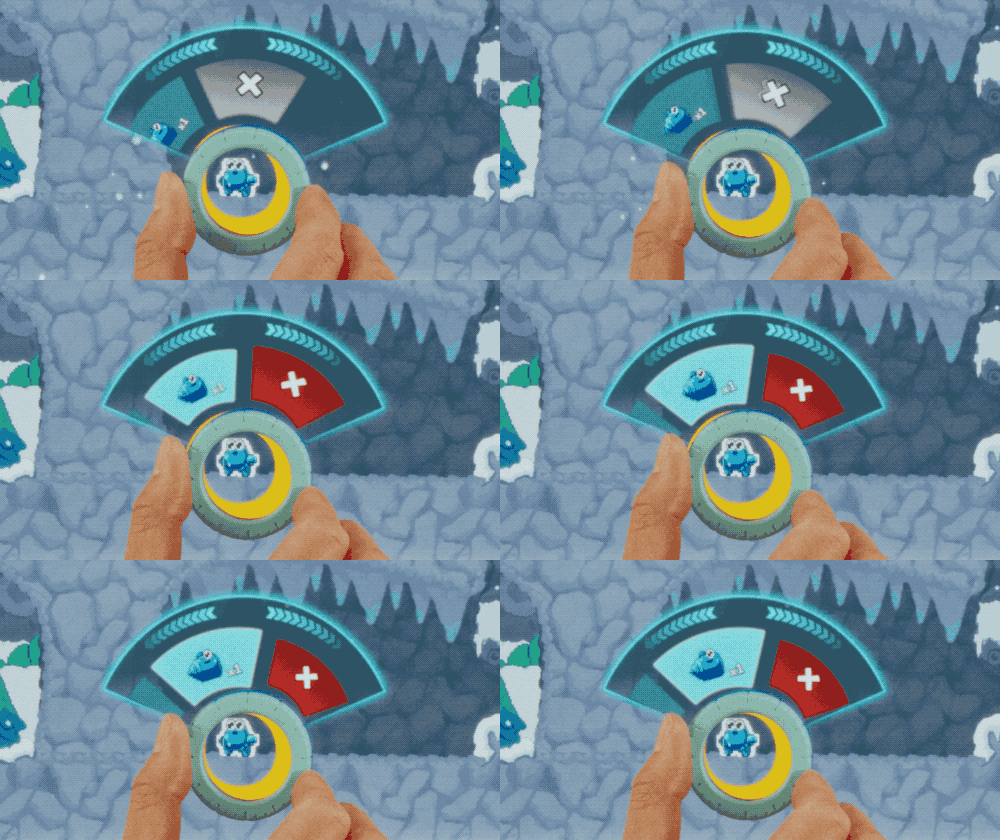
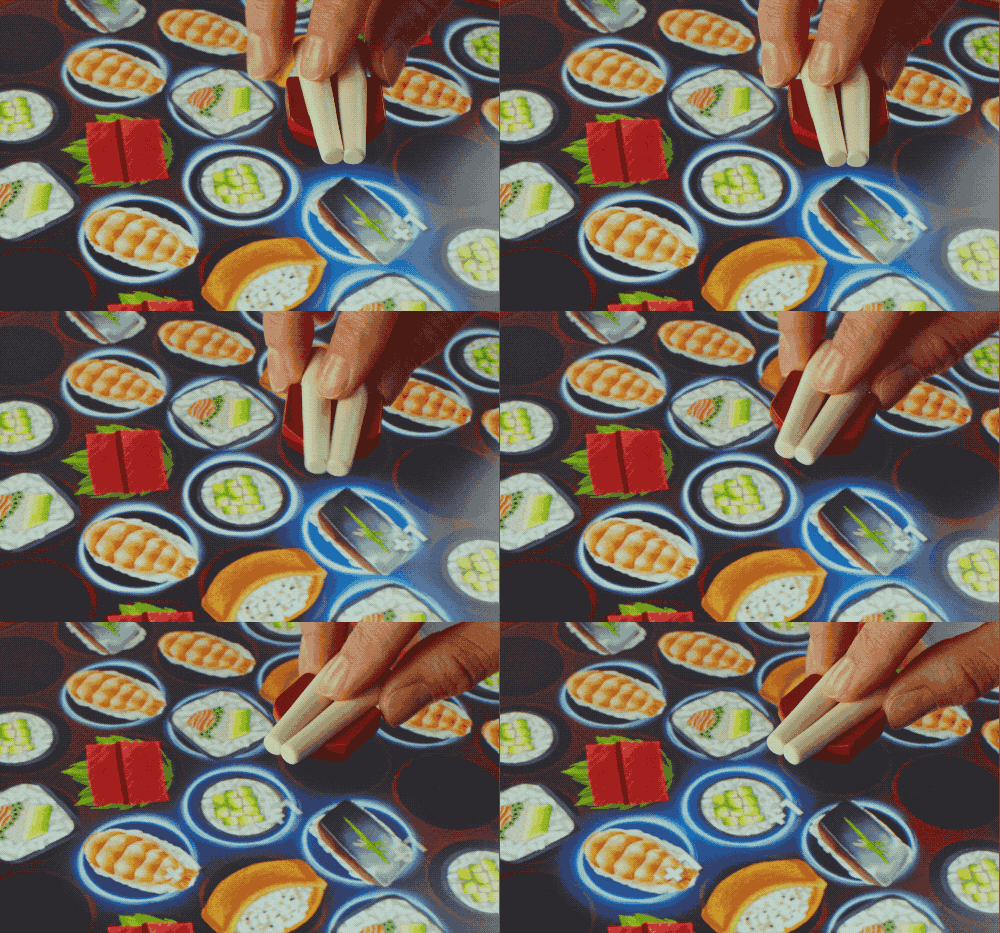
The player turns the Piece in place. The contact’s orientation changes while its position stays roughly constant. Use rotation for:
- Dials and combination locks. The Piece is a physical knob.
- Aiming. Rotating a turret-style Piece selects the firing angle.
- Mode switches. A quarter turn toggles between two states.
Orientation is reported only for Pieces (fingers have none). The units differ per engine: Unity reports radians, Godot and Web report degrees. Apply it to your visual in the engine’s native rotation convention.
// Radians, counter-clockwise from vertical.
float rotation = contact.orientation;
transform.rotation = Quaternion.Euler(0, 0, rotation * Mathf.Rad2Deg);
// Degrees.
element.style.transform = `rotate(${c.orientation}deg)`;
# Degrees, screen-clockwise positive.
sprite.rotation_degrees = c.orientation
Design tips:
- Rotation is harder to control than translation, so give players visual feedback on the current angle with deadbands at the cardinal positions.
- Do not punish overshoot. A 5-degree tolerance on a 90-degree snap target reads as forgiving; a 1-degree tolerance reads as broken.
- Make the rotation axis obvious from the Piece’s shape. A symmetric Piece does not telegraph which way is up, which actually makes it easier to turn while holding position. Rotate is best supported by Pieces with rotational symmetry.
Twist
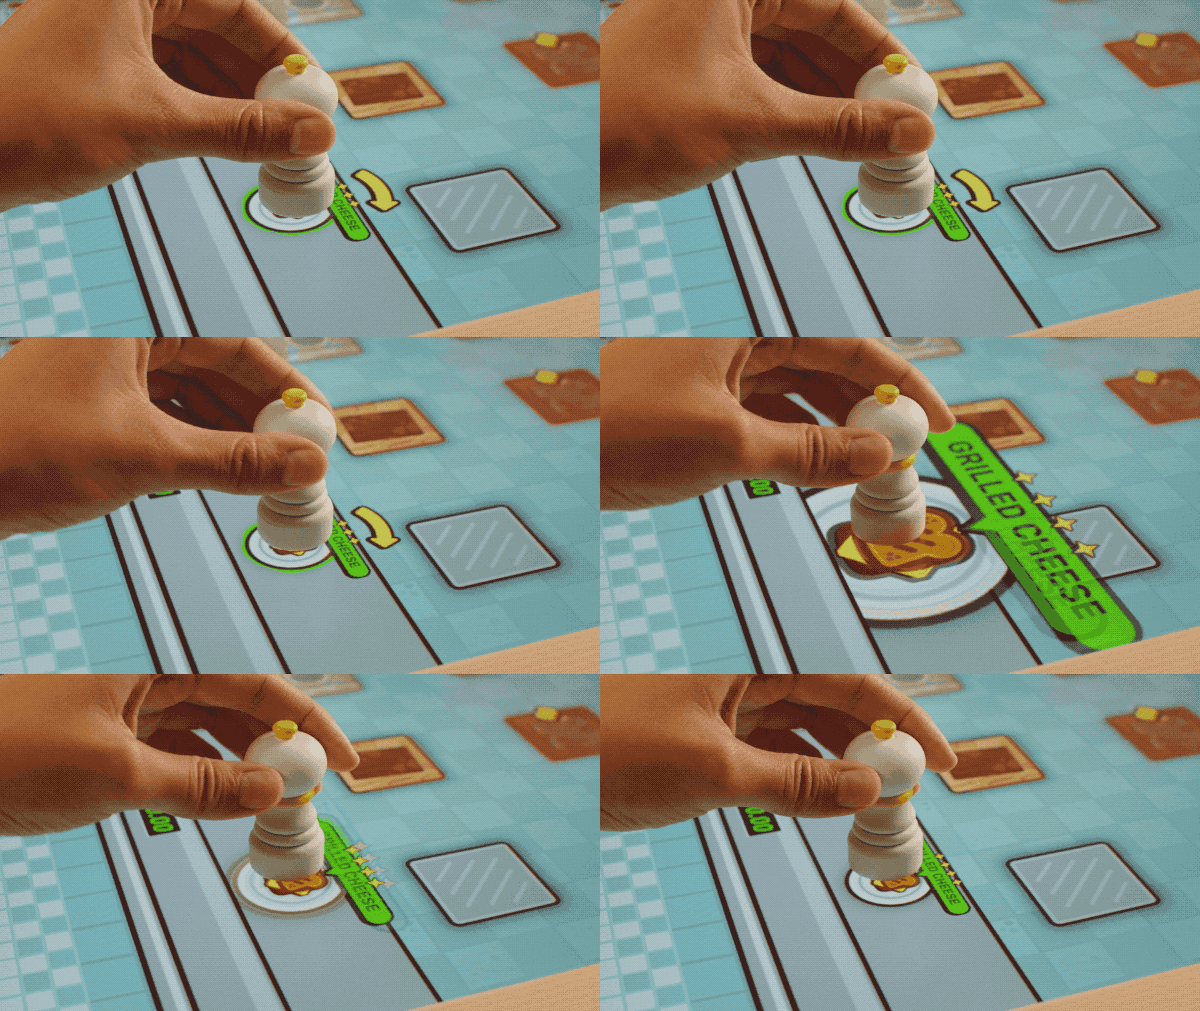
A quick, discrete rotational change, distinct from continuous rotation. Twisting a Piece could:
- Toggle a state (active or inactive, friend or foe).
- Confirm an action (rotate to lock in).
- Trigger a special (a fast spin is a “use ultimate” gesture).
Twist is gesture, not value: do not read the final angle, read that the player turned the Piece quickly past a threshold. Compare orientation against the previous frame’s orientation for the same contact id and look for a large change in a short time.
Design tips:
- Read the rate of change, not the resting angle. Twist is about a sudden change in orientation, not precision.
- Give a satisfying punctuation: sound, animation, screen flash. Twist is a one-shot, so treat it like one.
Touch and Release (Hold)
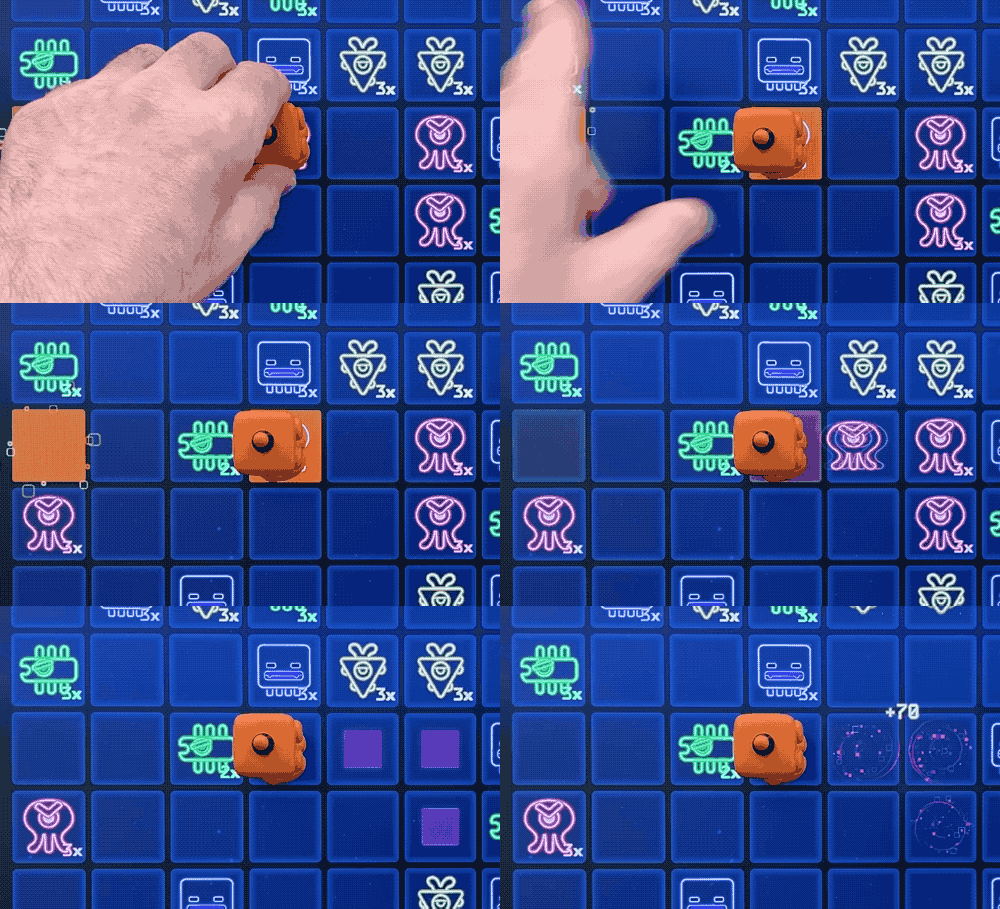
The Piece stays on the display, but the player picks it up and holds it. Almost all of Board’s Pieces are made with a capacitive coating, so Board can detect whether a hand is on the Piece. That state is exposed as the contact’s touched flag, which flips true while the player holds the Piece. (Strata’s blocks are the exception: they are not capacitive, so they never report touched.) This is the primitive for:
- Hold-to-activate abilities. Holding a Piece charges a power; releasing fires it.
- Selection. The held Piece is “selected” until released.
- Disambiguation. When the player has two Pieces near each other, the one they are holding is the one they mean.
- Confirming a slide. A move made by sliding (rather than lift-and-place) can be left uncommitted until the player stops touching the Piece. This is how Cosmic Crush confirms robot placement.
There is no edge signal for touch and release: each SDK hands you a full per-frame snapshot of contacts (Unity polls it, Godot emits it on contacts_received, Web pushes it to your subscribe callback). To detect the touch and release edge, keep your own previous-frame map keyed by contact id and diff the touched flag each frame.
using System.Collections.Generic;
using Board.Input;

// contactId -> was the Piece touched last frame
readonly Dictionary<int, bool> _prevTouched = new();

void Update()
{
    var contacts = BoardInput.GetActiveContacts(BoardContactType.Glyph);
    foreach (var c in contacts)
    {
        bool wasTouched = _prevTouched.TryGetValue(c.contactId, out var t) && t;
        if (c.isTouched && !wasTouched)
            OnHoldBegan(c);       // picked up
        else if (wasTouched && !c.isTouched)
            OnHoldReleased(c);    // set down
    }

    _prevTouched.Clear();
    foreach (var c in contacts)
        _prevTouched[c.contactId] = c.isTouched;
}
import { type BoardContact } from "@board.fun/web-sdk";

// contactId -> was the Piece touched last frame
let prevTouched = new Map<number, boolean>();

function onContacts(contacts: ReadonlyArray<BoardContact>) {
  for (const c of contacts) {
    if (c.glyphId <= 0) continue;   // fingers have no hold state
    const wasTouched = prevTouched.get(c.contactId) ?? false;
    if (c.isTouched && !wasTouched) {
      onHoldBegan(c);       // picked up
    } else if (wasTouched && !c.isTouched) {
      onHoldReleased(c);    // set down
    }
  }
  prevTouched = new Map(contacts.map(c => [c.contactId, c.isTouched]));
}
var _prev := {}  # contact_id -> is_touched

func _on_contacts_received(contacts: Array) -> void:
    for c in contacts:
        if c.glyph_id <= 0:        # fingers, not Pieces, have no hold state
            continue
        var id: int = c.contact_id
        var was_touched: bool = _prev.get(id, false)
        if c.is_touched and not was_touched:
            on_hold_began(c)       # picked up
        elif was_touched and not c.is_touched:
            on_hold_released(c)    # set down
    _prev.clear()
    for c in contacts:
        _prev[c.contact_id] = c.is_touched
On Unity, fingers always report touched as true; on Godot and Web, fingers (Glyph id 0) carry no meaningful hold state. Either way, gate hold detection on Piece contacts so a finger never trips a hold. The snippets above do this by reading only Glyph contacts (Unity) or skipping Glyph id 0 (Godot, Web).
Design tips:
- A short hold (200ms) is comfortable; anything longer than 1.5 seconds feels like a stuck button.
- Quick taps are hard to rely on as a confident contact; holding a Piece for a set duration is more dependable for displaying UI or activating an ability.
- Give continuous feedback during the hold (a fill meter, a swelling tone) so the player knows the game registered the touch.
Piece categories
Pieces in a set typically fall into one of three functional categories. These are not enforced by the SDK; they are conventions that help players form mental models about what each Piece does. They are rough categories, not hard rules: some Pieces fit more than one, and some (like the blocks in Strata) fit none neatly.
Pawn Pieces (also called Character Pieces)
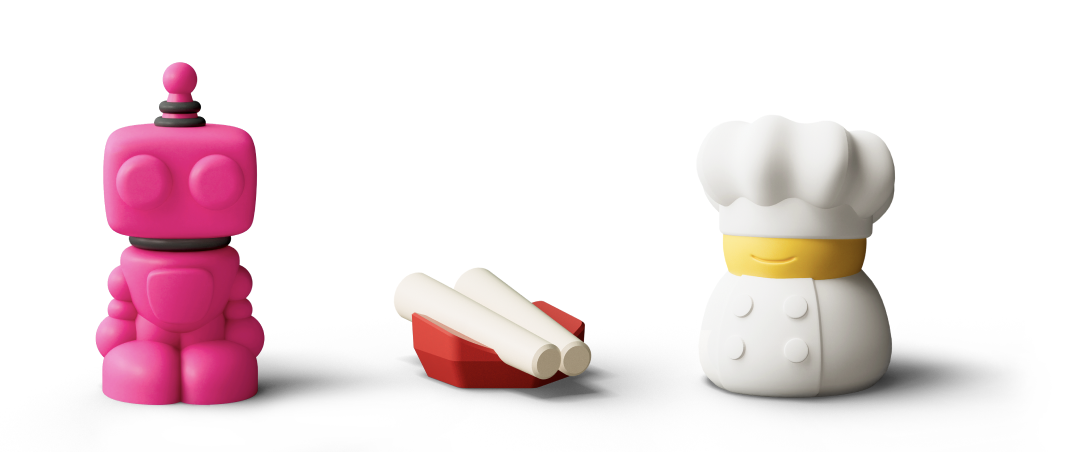
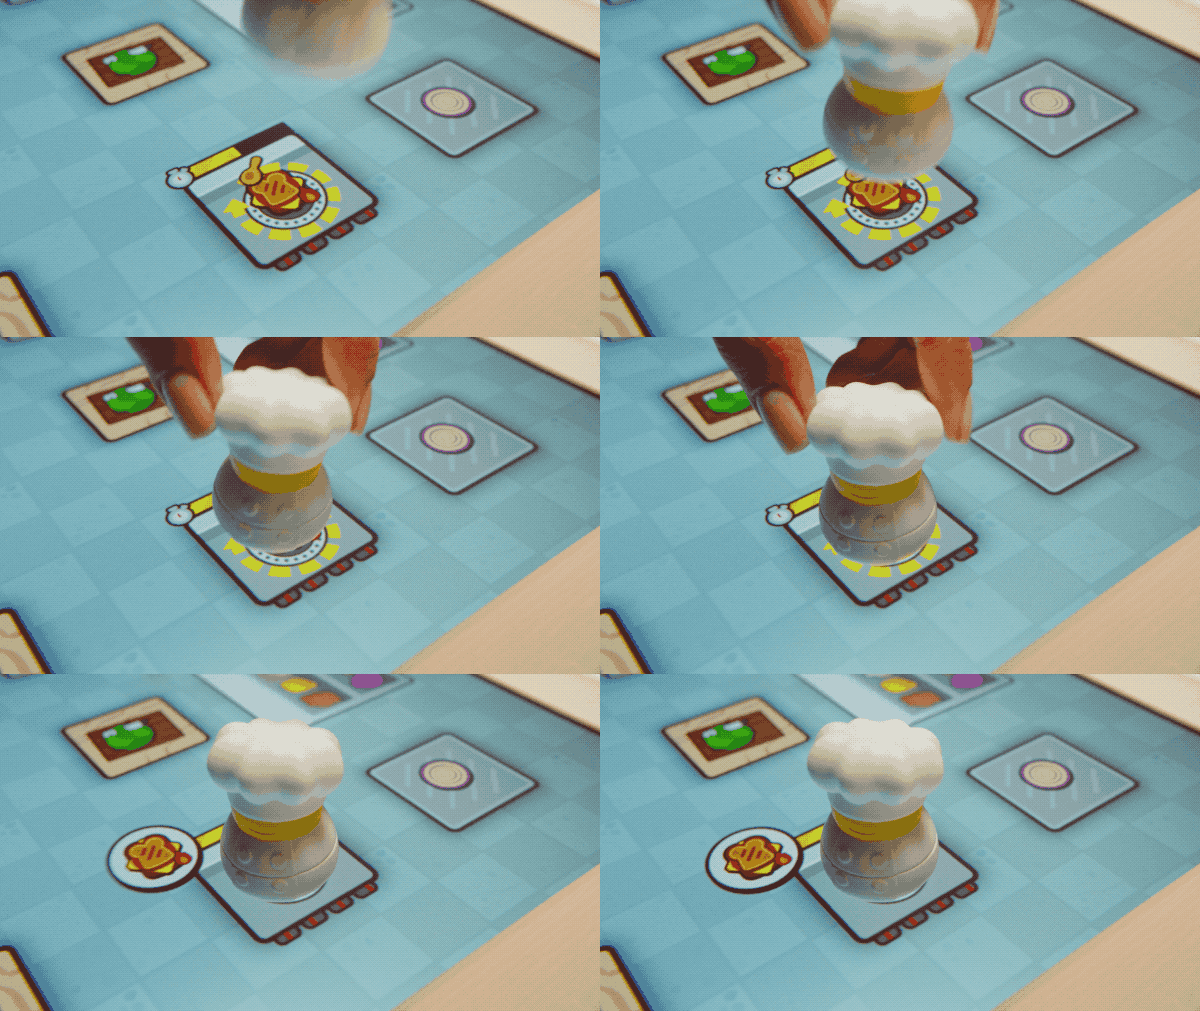
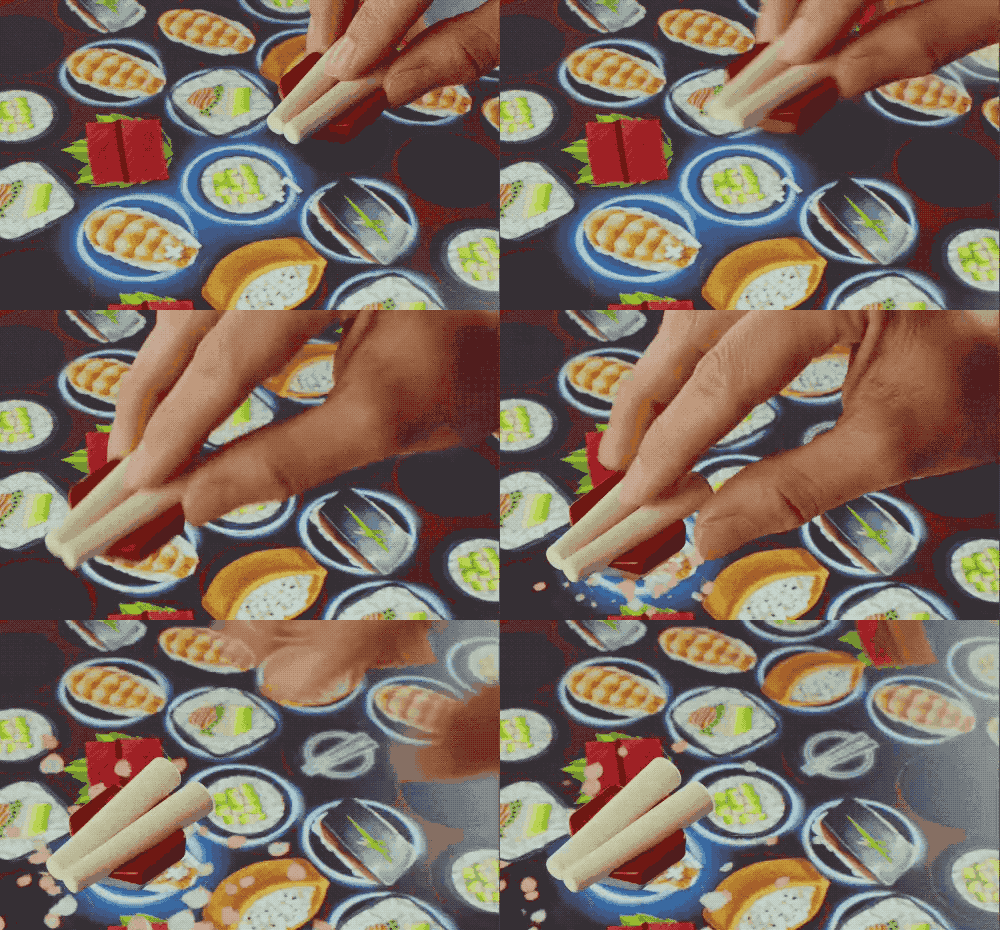
Pieces that represent the player or a player’s units, like classic board game pieces. They move around the board through placement and sliding, and they are persistent: the player keeps the same Pawn for the whole game. A Pawn does not have to be literally a character; it can be any object whose movement represents a player’s position or status.
Design conventions:
- One Pawn per player. Players identify with their Pawn; mixing them creates confusion.
- Distinct shapes or colors per Pawn. Players need to find their Piece at a glance from any seat.
- Pawn motion is the primary input. Pawns should not require Twist or Shake; those are for Action Pieces, though Pawns often use rotation and sliding in addition to place-and-lift.
Examples: the robots in Cosmic Crush and Snek; the chopsticks in Omakase; Little Chef in Chop Chop.
Action Pieces (also called Verb Pieces)
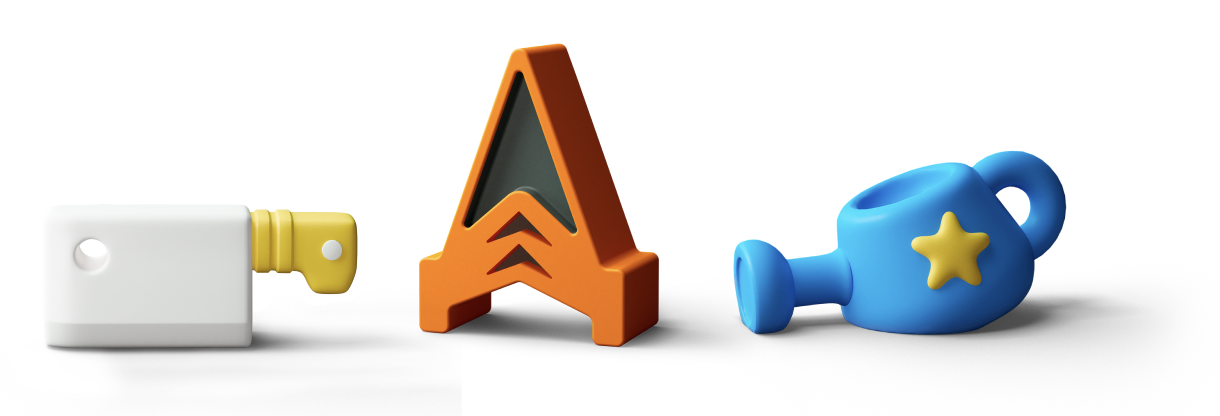
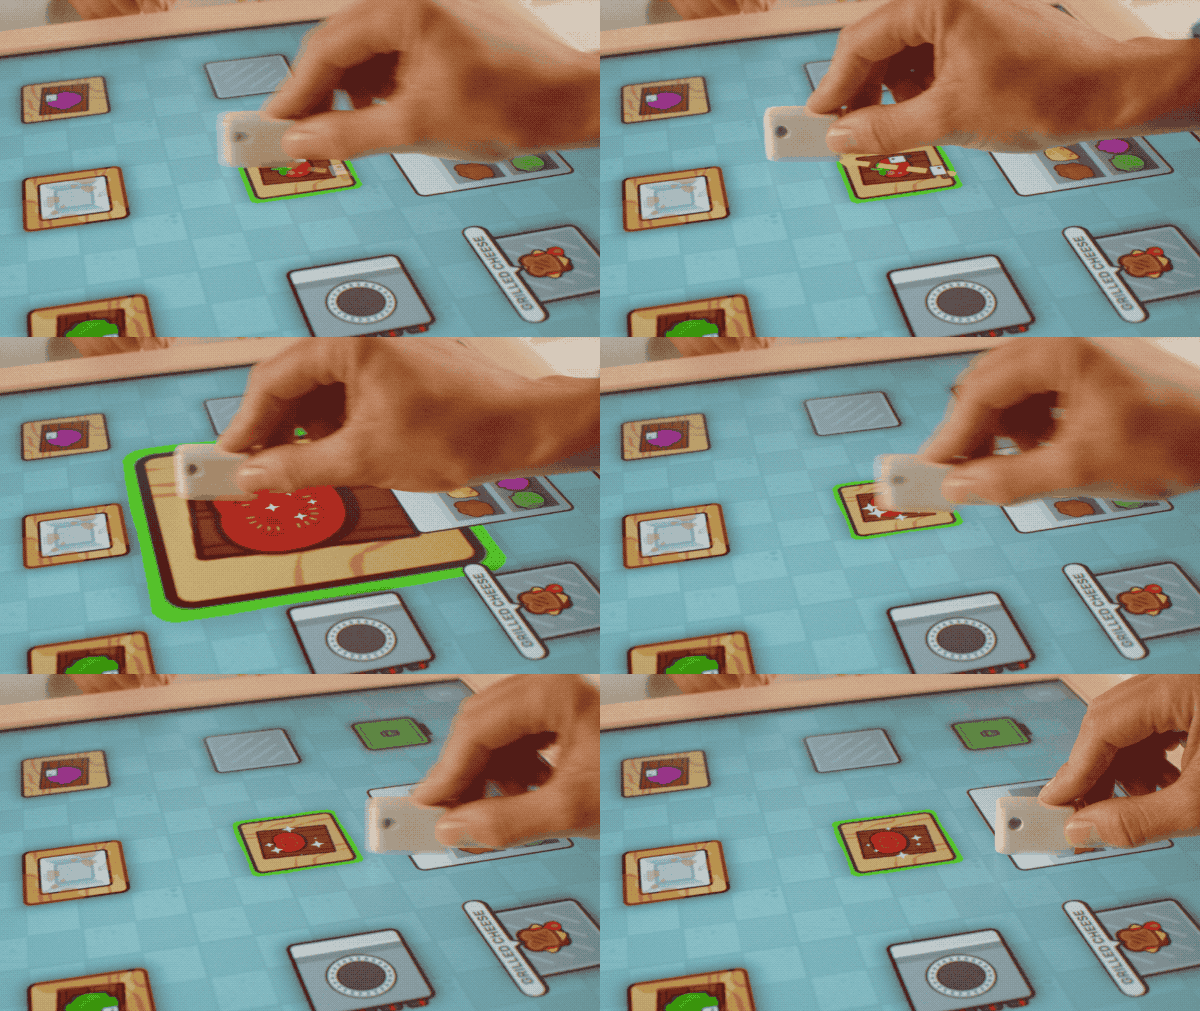
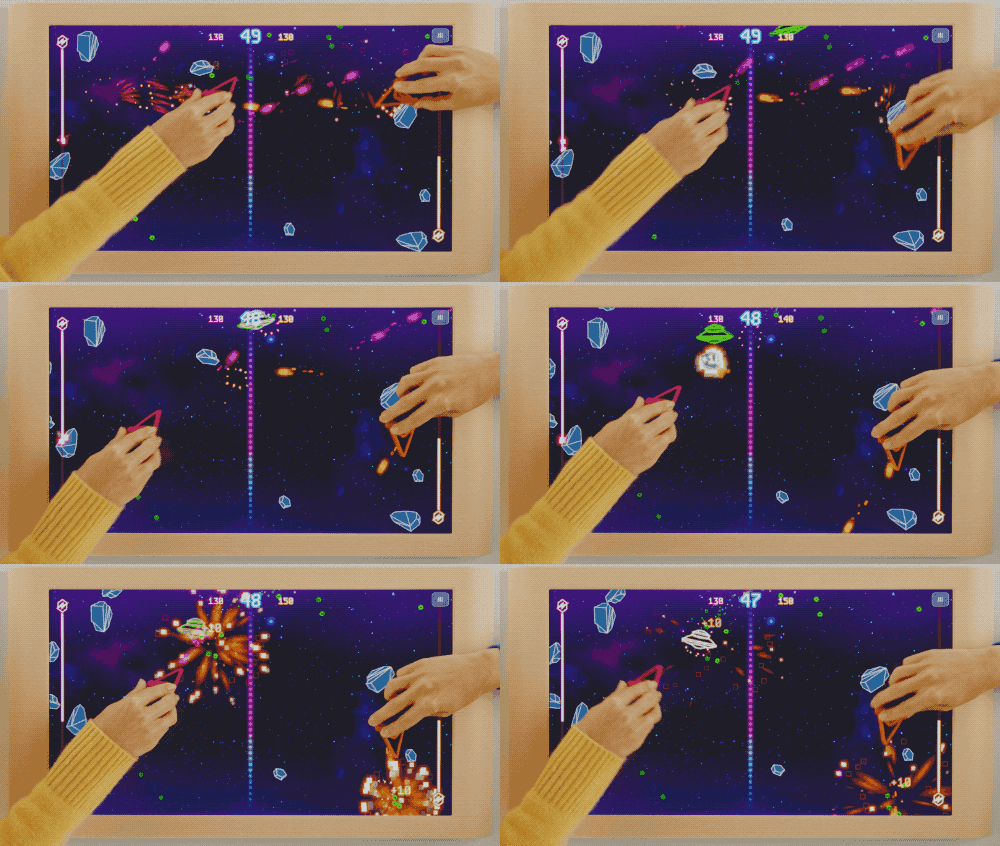
Single-purpose Pieces that trigger discrete events when interacted with. The player picks up an Action Piece, uses it, and sets it back down, like cards in a hand. The physical design of an Action Piece advertises how it is meant to be used: a knife for slicing, a watering can for watering, a spaceship for shooting. When an Action Piece is used, the screen should visibly and audibly react.
Design conventions:
- One affordance per Piece. A “Fire” Piece fires; it does not also “Heal.”
- Action Pieces are reusable but stateless. They do not track HP or charge from one use to the next; that is what Pawns are for.
- Action Pieces respond best to a clear commit moment. Watch the snapshot and fire on the frame a Piece’s touched flag flips true (the diff pattern under Touch and Release). Do not make the player guess when the action commits.
Examples: the knife in Chop Chop; a watering can; a spaceship in Space Rocks or Starfire.
Reaction Pieces (also called Platform Pieces)
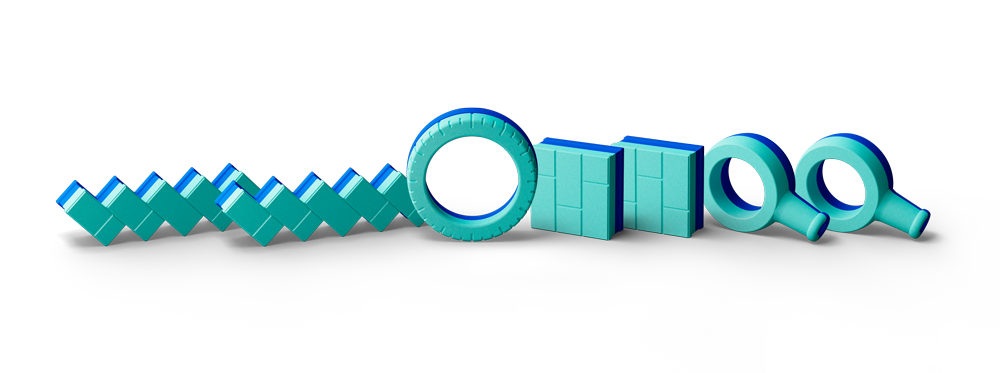
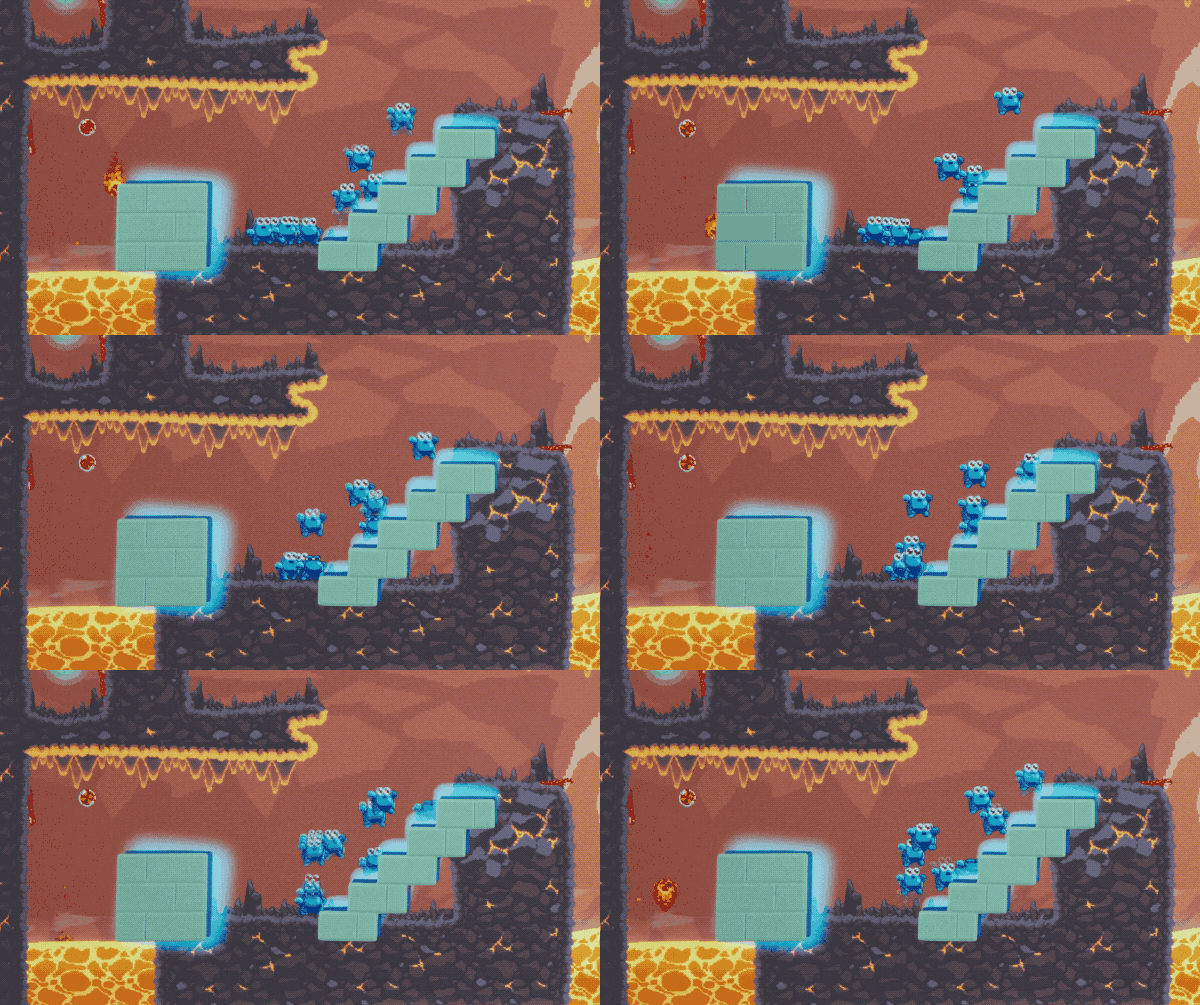
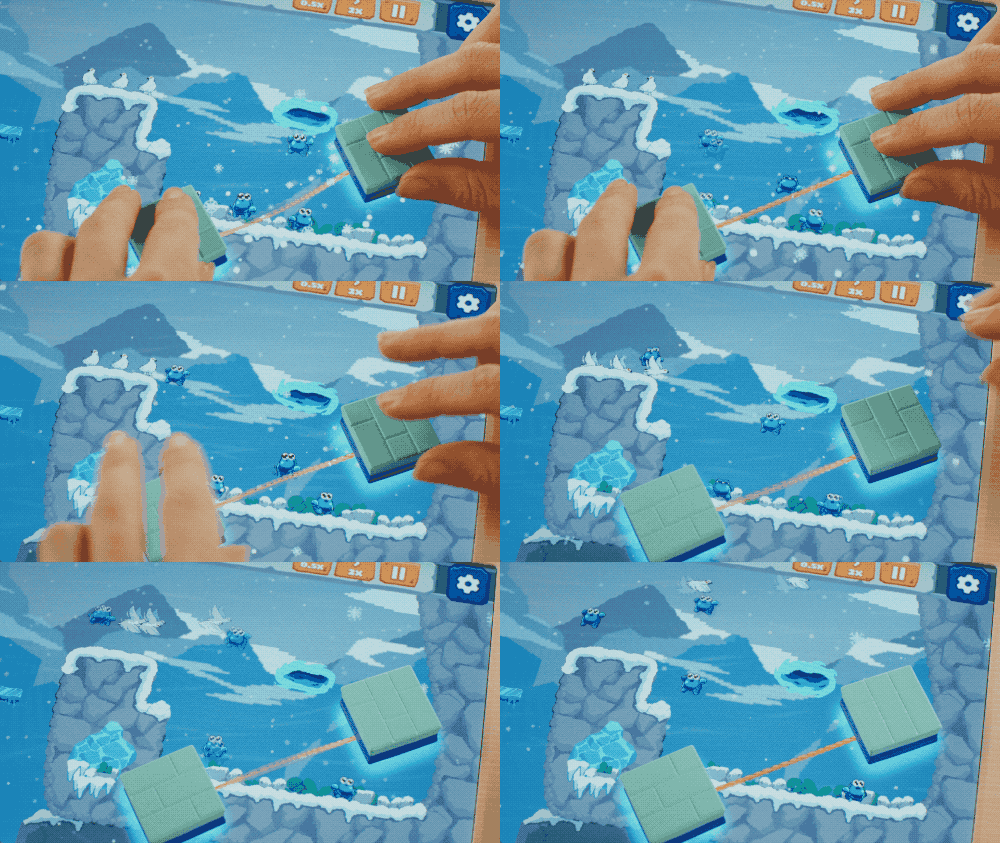
Pieces placed on the board as persistent world elements. They do not move (or move rarely), and the digital game world responds to them being where they are. These Pieces can also create digital elements on screen, like the blocks that form a bungee in Save the Bloogs.
Design conventions:
- Reaction Pieces define terrain. A “Wall” Piece blocks movement; a “Trap” Piece damages anyone who enters its tile.
- They are typically placed once per setup or per turn, not handled every move.
- The game’s reaction to a Reaction Piece is the gameplay. Players see the consequences on screen, not on the Piece itself.
Examples: the stairs and blocks in Save the Bloogs; terrain tiles in a strategy game; resource nodes in an economy game.
Note: Most Piece Sets mix all three categories. A well-designed set tells the player which category a Piece belongs to by its physical form: Pawns look like characters, Actions look like tools, Reactions look like terrain.
To branch behavior by which physical Piece is on the board, switch on the contact’s Glyph id (the index of that Piece within your Piece Set). Use the Glyph id, not the contact’s position or type, because the same physical Piece keeps its Glyph id across frames.
if (contact.type == BoardContactType.Glyph)
{
    switch (contact.glyphId)
    {
        case 0: HandlePawn(contact);     break;  // Pawn: place + slide
        case 1: HandleActionPiece(contact); break;  // Action: tap to commit
        case 2: HandleReactionPiece(contact); break;  // Reaction: persistent terrain
    }
}
if (c.glyphId > 0) {
  switch (c.glyphId) {
    case 1: handlePawn(c);          break;  // Pawn: place + slide
    case 2: handleActionPiece(c);   break;  // Action: tap to commit
    case 3: handleReactionPiece(c); break;  // Reaction: persistent terrain
  }
}
# On the Godot channel use glyph_id (not type_id) to tell Pieces apart.
if c.glyph_id > 0:
    match c.glyph_id:
        1: handle_pawn(c)            # Pawn: place + slide
        2: handle_action_piece(c)    # Action: tap to commit
        3: handle_reaction_piece(c)  # Reaction: persistent terrain
Glyph ids are indices into your Piece Set. The exact value for each physical Piece is fixed by the Piece Set Model; to learn which id is which, place one Piece at a time and log the id. On Unity, finger contacts report a Glyph id of -1; on Godot and Web, fingers report 0. On Unity, Piece Glyph ids are 0-based (first Piece = 0) and fingers are -1, so isolate Pieces by checking
type == BoardContactType.Glyph(notglyphId > 0). On Godot and Web, Piece Glyph ids are 1-based (first Piece = 1) and fingers are 0, so theglyphId > 0guard isolates Pieces there. See Touch for the per-SDK details of reading Glyph ids and distinguishing fingers from Pieces.
Interfaces and signifiers
Part of the challenge of Board is that with a new kind of controller, you have to teach players how and where Pieces are used. Players need to be told when to place a Piece, what Piece to place, how to use it once placed, and when a placement is wrong. Board games use a handful of overlapping UI conventions for this.
Piece Indicators
On-screen cues that tell the player which Pieces are in play and where to place them. Chop Chop and Mushka use 3D renders of Pieces to show where to place them; Bloogs and Strata tutorials show which Piece to place and where.
- Show a render of the physical Piece next to its name.
- Use the same color and icon throughout the game so the player learns the mapping once.
- Place indicators near where the player is expected to look: adjacent to the play area, not buried in a menu.
Icons
Establish a consistent icon vocabulary so players learn each Piece’s meaning once. A sword Piece should be paired with the same sword glyph everywhere it appears: on the Piece indicator, on the action confirmation, on the score readout, on the tutorial overlay. Chop Chop shows an icon for which Piece to use at each station; Strata shows icons for the three Pieces in your turn; Omakase marks the current chopstick position with a chopstick icon.
- Reuse the same icon at every scale. Do not redraw it small for the HUD and large for the title screen.
- Lean on iconic silhouettes. The icon needs to read at a glance from across the table.
- When a Piece has multiple states (charged or discharged, active or inactive), modulate the same icon (color, fill level, outline) rather than swapping it for a different glyph.
Action Indicators
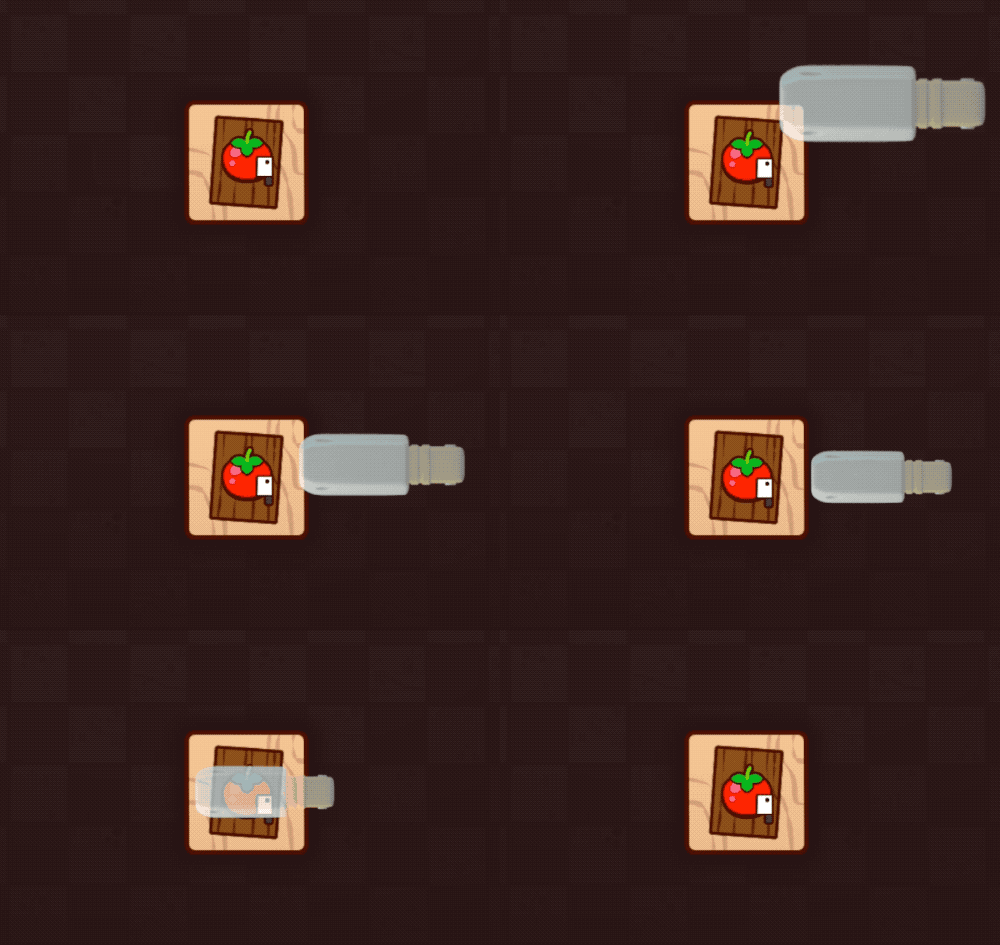
Visual cues for how to interact with a Piece: arrows showing direction of motion, rotational glyphs showing twist, particles showing shake. In Chop Chop a knife icon appears on the cutting board showing where and how to slice. Use these when the interaction is not obvious from the Piece’s shape.
- Animate the indicator. A static arrow is a sign; an animated one is a beckon.
- Fade indicators out after the player demonstrates they understand. Do not lecture experienced players.
- Use sound to reinforce. A swoosh tells the player “we expect motion here” even if their eyes are on the Piece.
Placement Confirmation
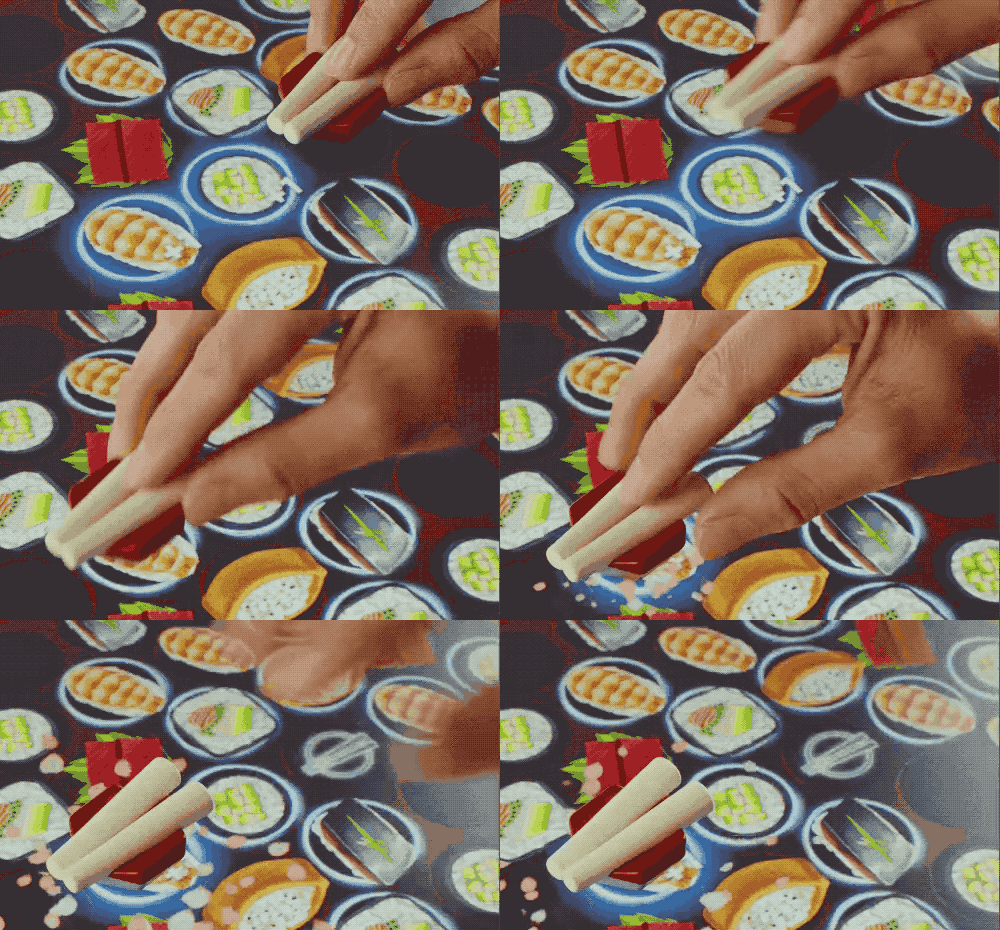
Feedback the moment a Piece arrives on a valid target, confirming both that the Piece was detected and that Board knows which Piece it is. This is the most important signifier you can ship, because players cannot recover from a placement they did not notice. Strata uses Piece confetti and outlines; Omakase shows petals; Chop Chop highlights stations; Bloogs shows a Piece-down confirmation.
- Confirm visually (the target glows, the Piece is outlined).
- Confirm audibly (a satisfying click, a positive chime).
- Make rejection unambiguous by not advancing. If the game does not move to the next state, the placement was rejected.
Action Confirmation
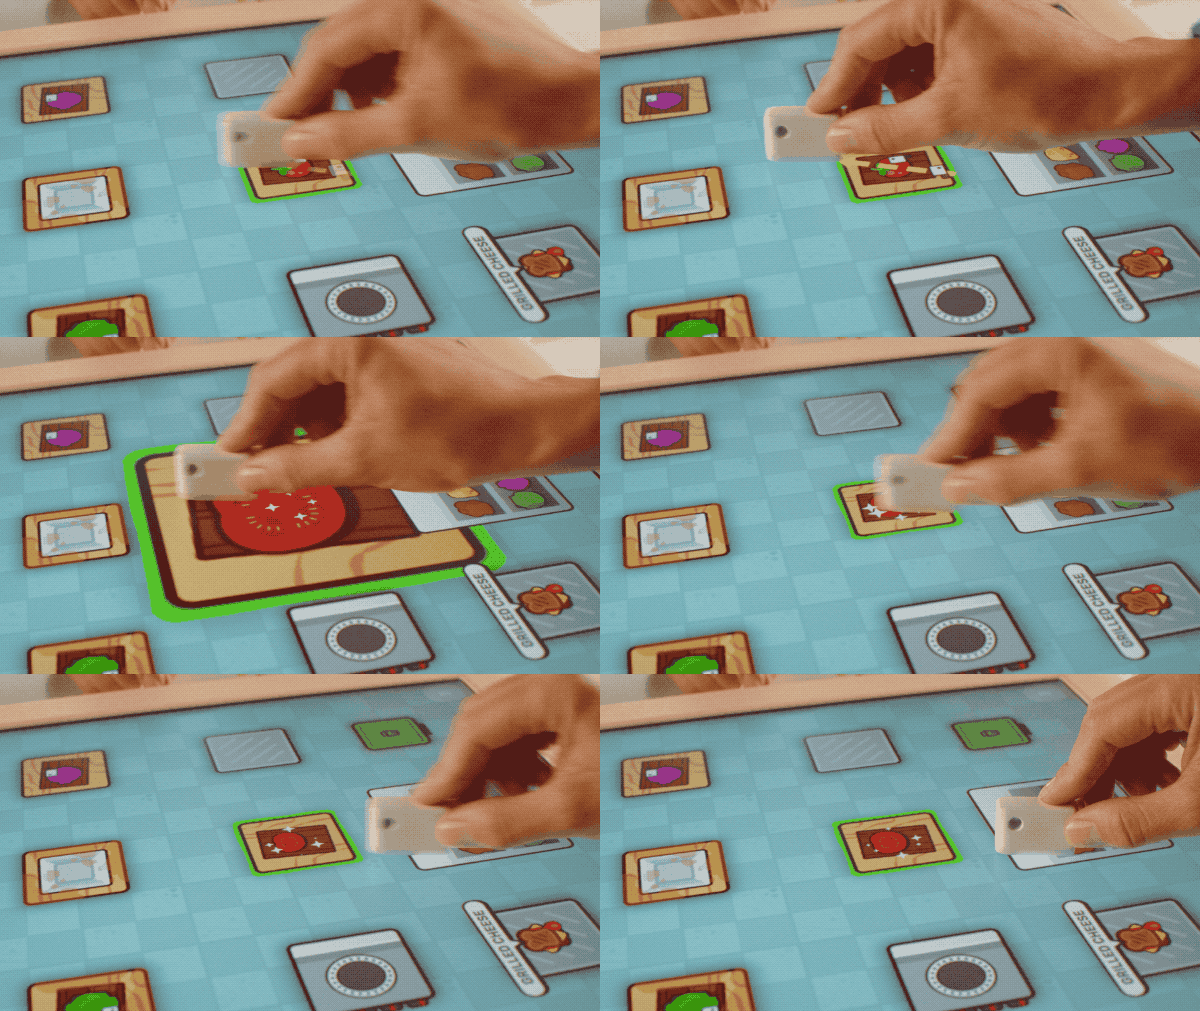
Feedback that an Action Piece triggered, distinct from placement. The player needs to know “yes, I cast the spell,” not just “yes, I touched the Piece.” Chop Chop’s stations “pop” when an action completes.
- Pair every Action with a state change visible on screen.
- Make the audio match the action category. Defensive actions should sound different from offensive ones.
- Do not repeat the confirmation. Firing the same Action twice should sound different from firing it once.
Communicating Invalid Placement
Tell the player that the wrong Piece was placed, or placed in the wrong spot or at the wrong time. Silent rejection feels like a bug. Chop Chop highlights a tile red when the wrong Piece lands on it; Cosmic Crush shows an error state for an invalid robot position; Space Rocks indicates when a ship is off-sides; Bloogs pauses and shows a message.
- Show the rejected target with a blocked outline (red, an X).
- Briefly flash an explanation: “Already occupied,” “Not your turn,” “Out of range.”
- Do not auto-correct. Moving the player’s Piece for them feels like the game took control away.
Tutorialization
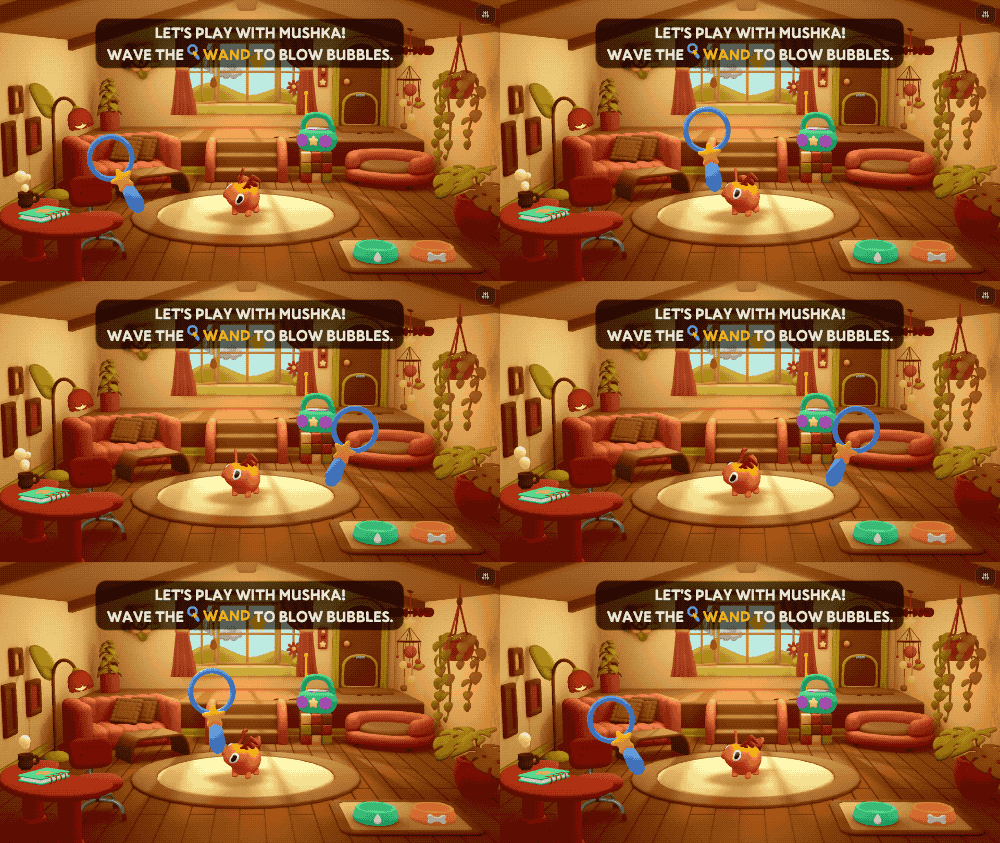
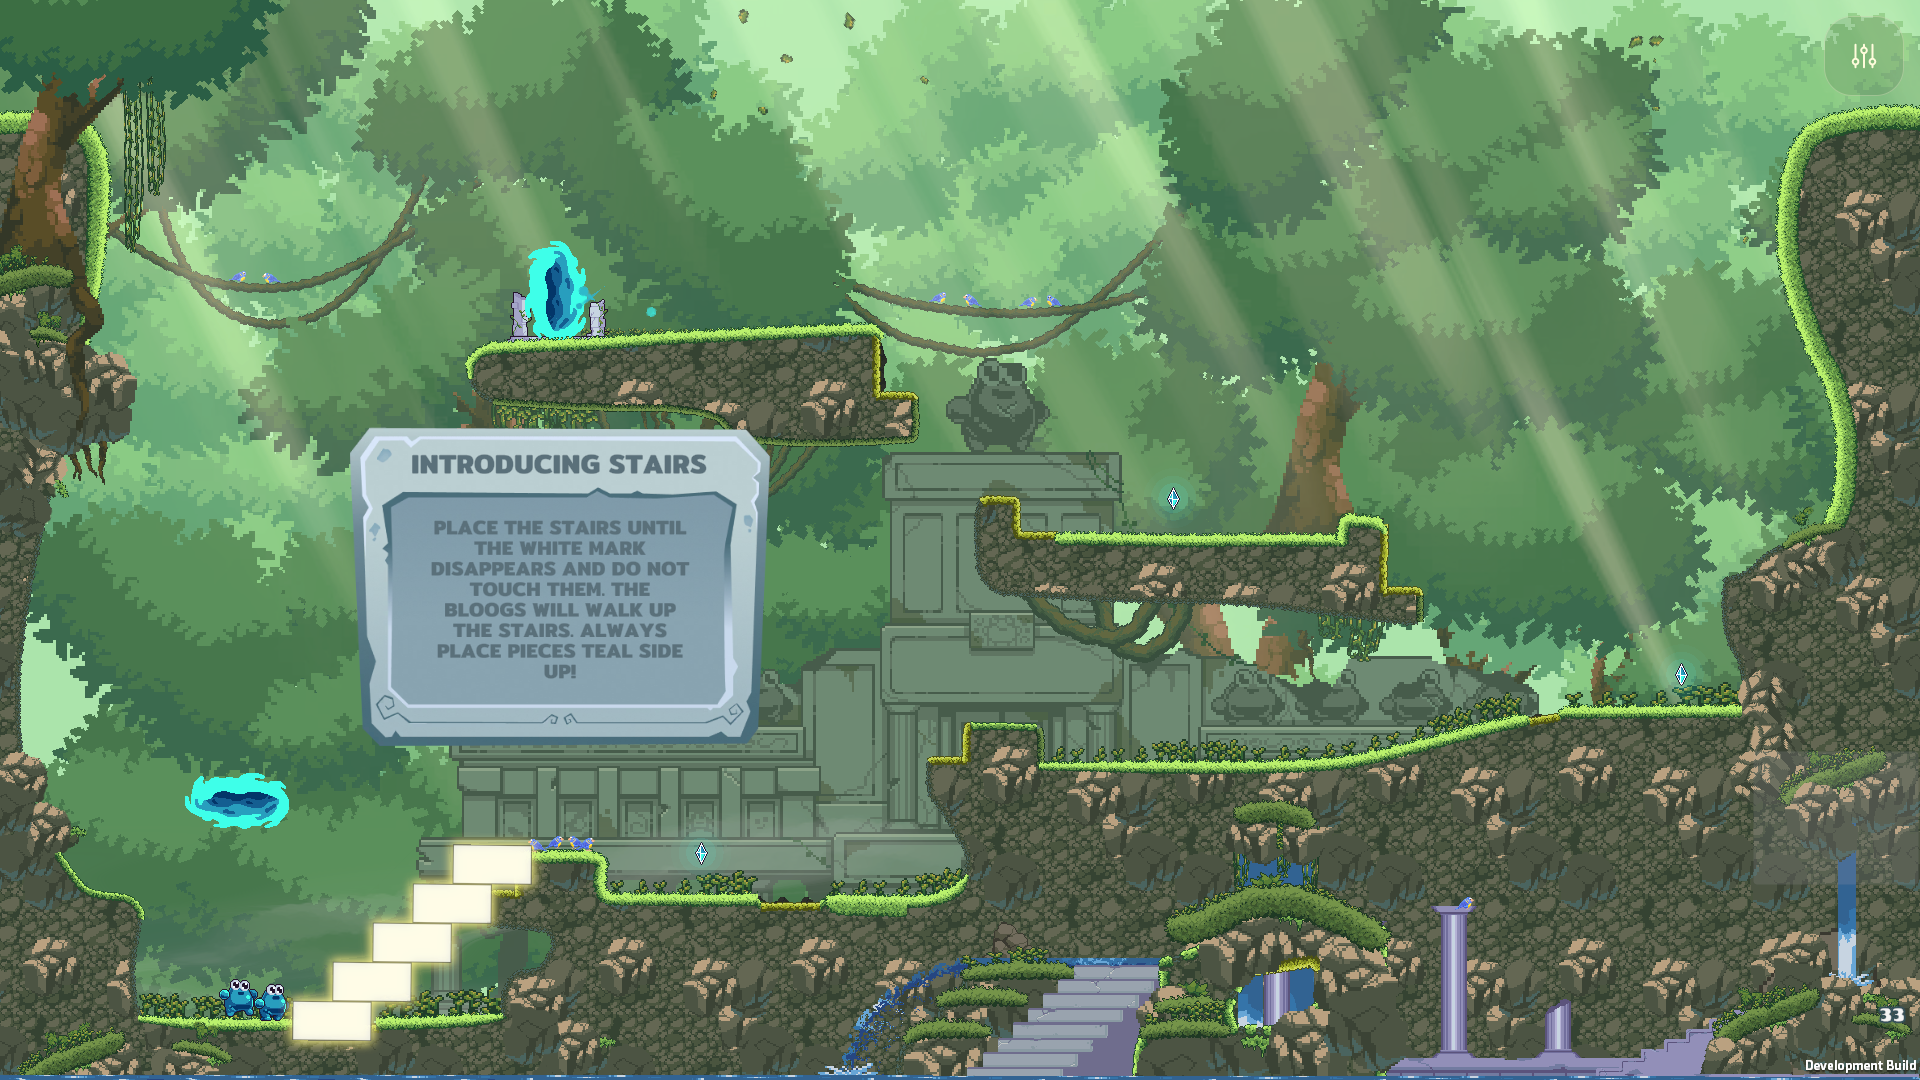
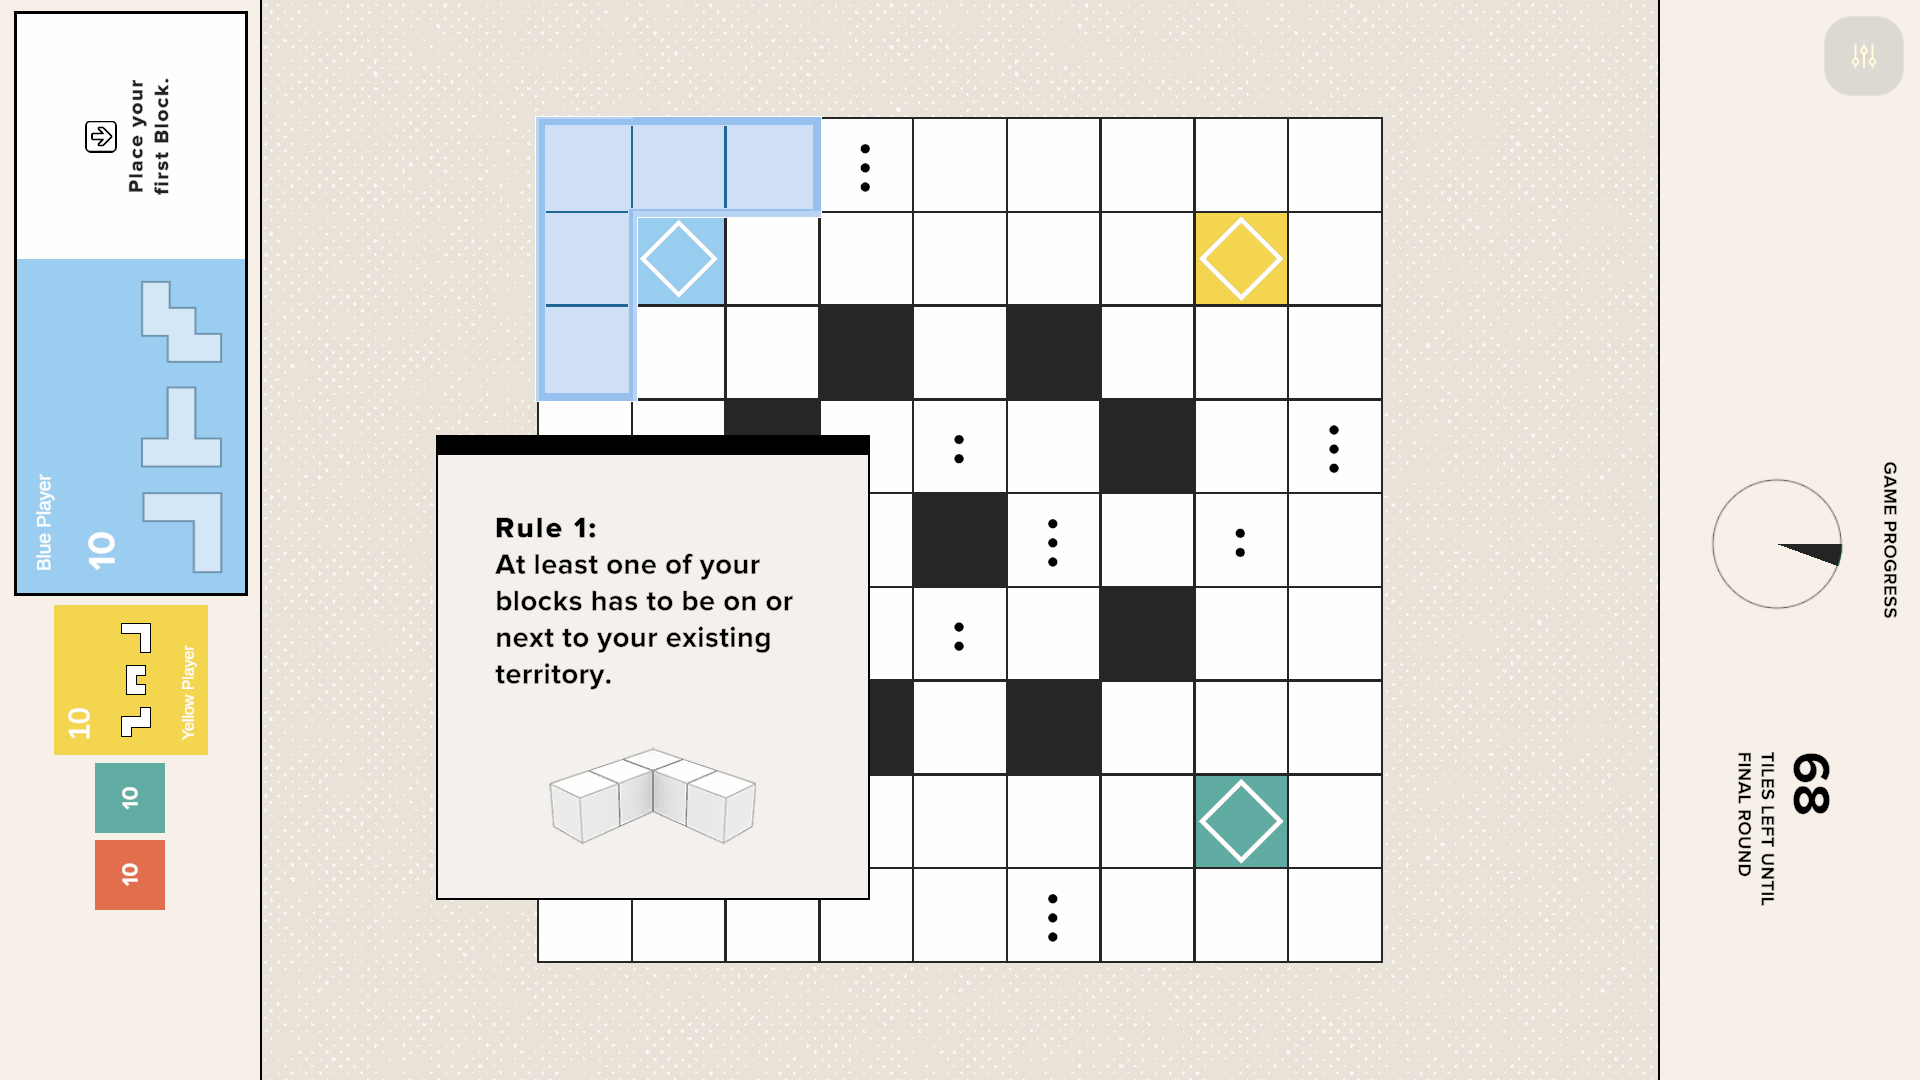
The first 30 seconds of a new player’s session is where you teach the mapping from physical Piece to game effect. Design that introduction explicitly rather than letting it emerge.
- Pick the first Piece for them. Make the first thing the player touches the easiest interaction (a Place) on the most important Pawn.
- Confirm the first action loudly. The first time a player places a Piece, they do not yet trust the system. Over-confirm the success: visual highlight, audio sting, on-screen label.
- Stage interactions. Do not ask for Twist or Trace until the player has used Place and Slide a few times. Introduce new primitives one at a time.
- Let failure teach. A clear invalid-placement signifier on the first attempt teaches the rule faster than a tutorial popup.
Design tips
Match interaction complexity to player skill
The first interaction a new player learns should be Place. Move them to Slide after they are comfortable. Reserve Twist, Shake, and Trace for players who have spent at least ten minutes with the game.
Avoid simultaneous required interactions
Asking a player to slide one Piece while twisting another asks them to use two hands at once. Stagger interactions: let the player commit one before the next is required.
Let the table read the state
The best Board moments happen when a player who is not looking at the screen can still tell what is going on. Lean on physical state: a Piece on a corner means something, a Piece in the middle means something else. Make those positions matter.
Account for table position
Players sit on all sides of the Board. Do not design Piece-orientation puzzles that only make sense from one seat. Use radial layouts, rotate UI per player when appropriate, and assume any Piece will be approached from any angle.
Design forgiving thresholds
Real-world physical interactions are noisy. A Piece may drift, players overshoot, hands tremble. Always design with thresholds that tolerate a few millimeters of slop and a few degrees of rotation error. The game should feel like it is working with the player, not testing their precision.
Use sound generously
Players spend much of their time looking at the Pieces, not the screen. Sound carries, so make sure every important state change has an audible counterpart.
Test on hardware
Touch interactions feel completely different on a real Board than in a desktop simulator. Get builds running on hardware as early as possible: the difference between “the player’s hand is heavier than the simulator’s mouse” and “the simulator does not capture inertia” is the difference between a game that ships and one that does not.
Putting it together
A well-designed Board game uses each interaction primitive for a single, distinct purpose, and tells the player which is which through visual and audio cues. A starting checklist:
- Identify the Pieces in your set. Sort them into Pawn, Action, and Reaction categories. Note which physical interactions each requires.
- Map each Piece to a primary interaction. Pawns use Place and Slide. Actions use Tap, Twist, or Shake. Reactions use Place.
- Plan the tutorialization. Apply the Tutorialization checklist to the player’s first 30 seconds: which Piece they touch first, what feedback they get, what they try next.
- Identify the failure modes. What happens when the player puts a Pawn on the wrong square? What happens when they twist instead of slide?
- Prototype on hardware. Build a five-minute slice and run it past someone who has never seen the game. Watch what they do with the Pieces: that tells you what your design is actually communicating.
See Also
- Pieces — how physical Pieces work and how Piece Sets map to Glyph ids
- Touch — how Board’s touch tech works
- Touch — the SDK side of every interaction described here (contact model, phases, coordinates, orientation)
- Player Management — handling the players who pick up those Pieces
- Per-SDK API references: Unity, Godot, Web